Fitnase WordPress Theme
Gym And Fitness WordPress Theme
Install WordPress
To get this theme you must have WordPress already installed. If you need help installing WordPress, follow the instructions in WordPress Codex. Below are some useful links on WordPress information:
- WordPress Codex – general information about WordPress and how to install it on your server.
- First Steps With WordPress – general information included a wide variety of topics.
- FAQ New To WordPress – most Frequently Asked Questions regarding WordPress.
Install Theme & Plugins
When purchasing Fitnase theme from Themeforest, you will be able to download Fitnase files from your Themeforest account. The main_files contains all files, you have to find fitnase.zip and upload it on your directory.The video below will show you how to install & register Fitnase theme.
Import demo data
Import Demo Data – Now users can quickly and easily import our demo content with only one click to the button. This is the preferred method because it's the fastest and easiest way to get our demo content. It will import all our pages, posts, sliders etc.. If you wish to use our One Click Demo Content Importer, please see the video below.
Theme options
Using theme options, you can control every setting on the theme. Let’s start learning theme options. Go to Fitnase > Theme Options
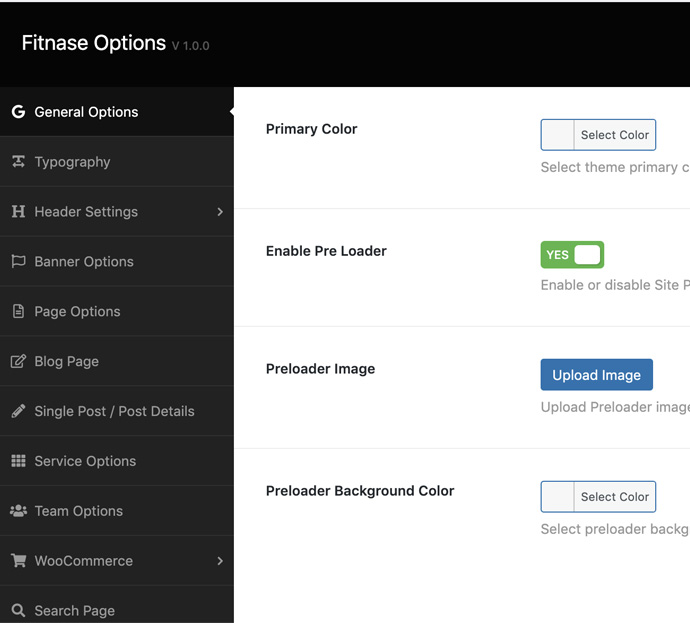
General Options
- Primary Color : — Select theme primary color
- Enable Preloader : — Enable or disable preloader
- Preloader Image : — Upload preloader image
- Preloader Background Color : — Select theme secondary color
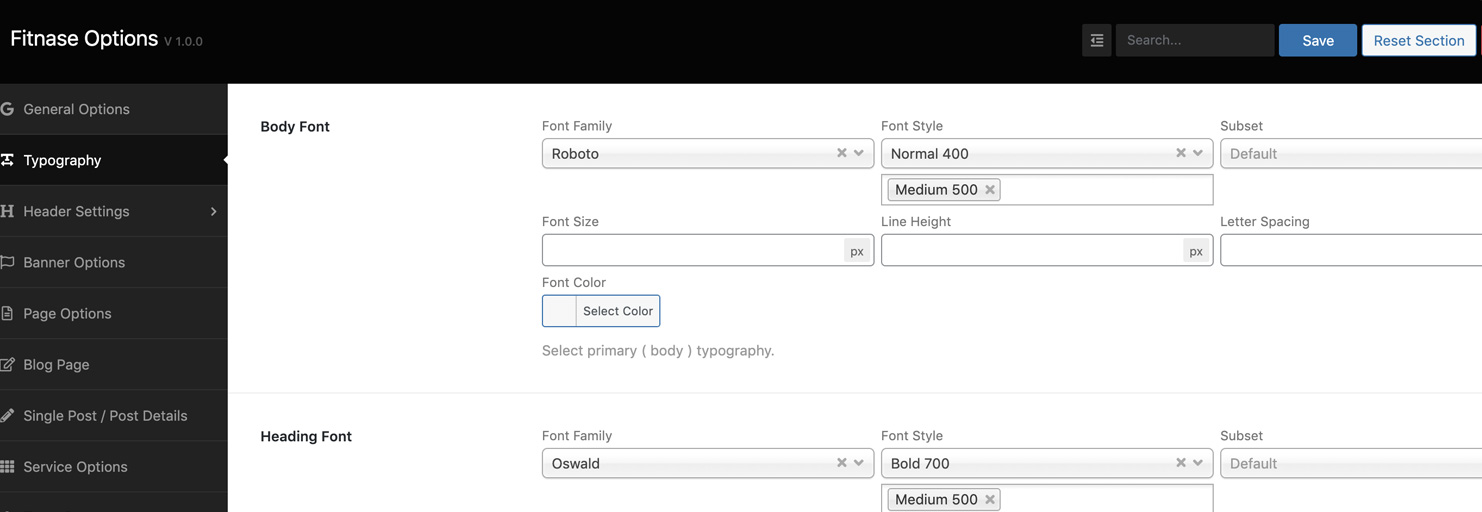
Typography
You can change theme typography from here
- Body Font: — Select body typography.
- Heading Font: — Select heading typography.
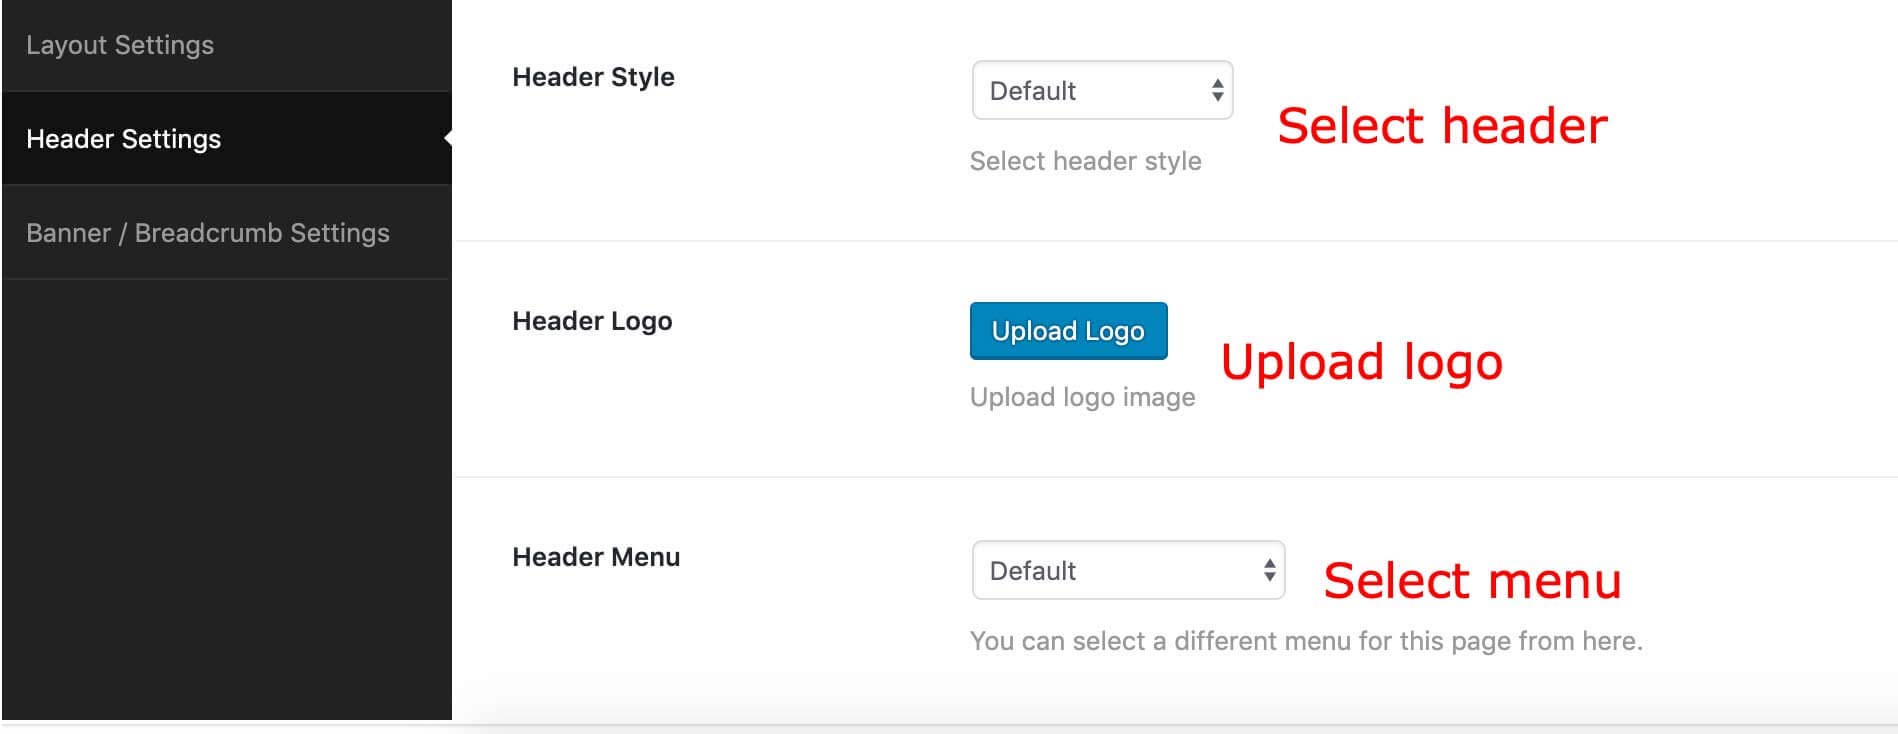
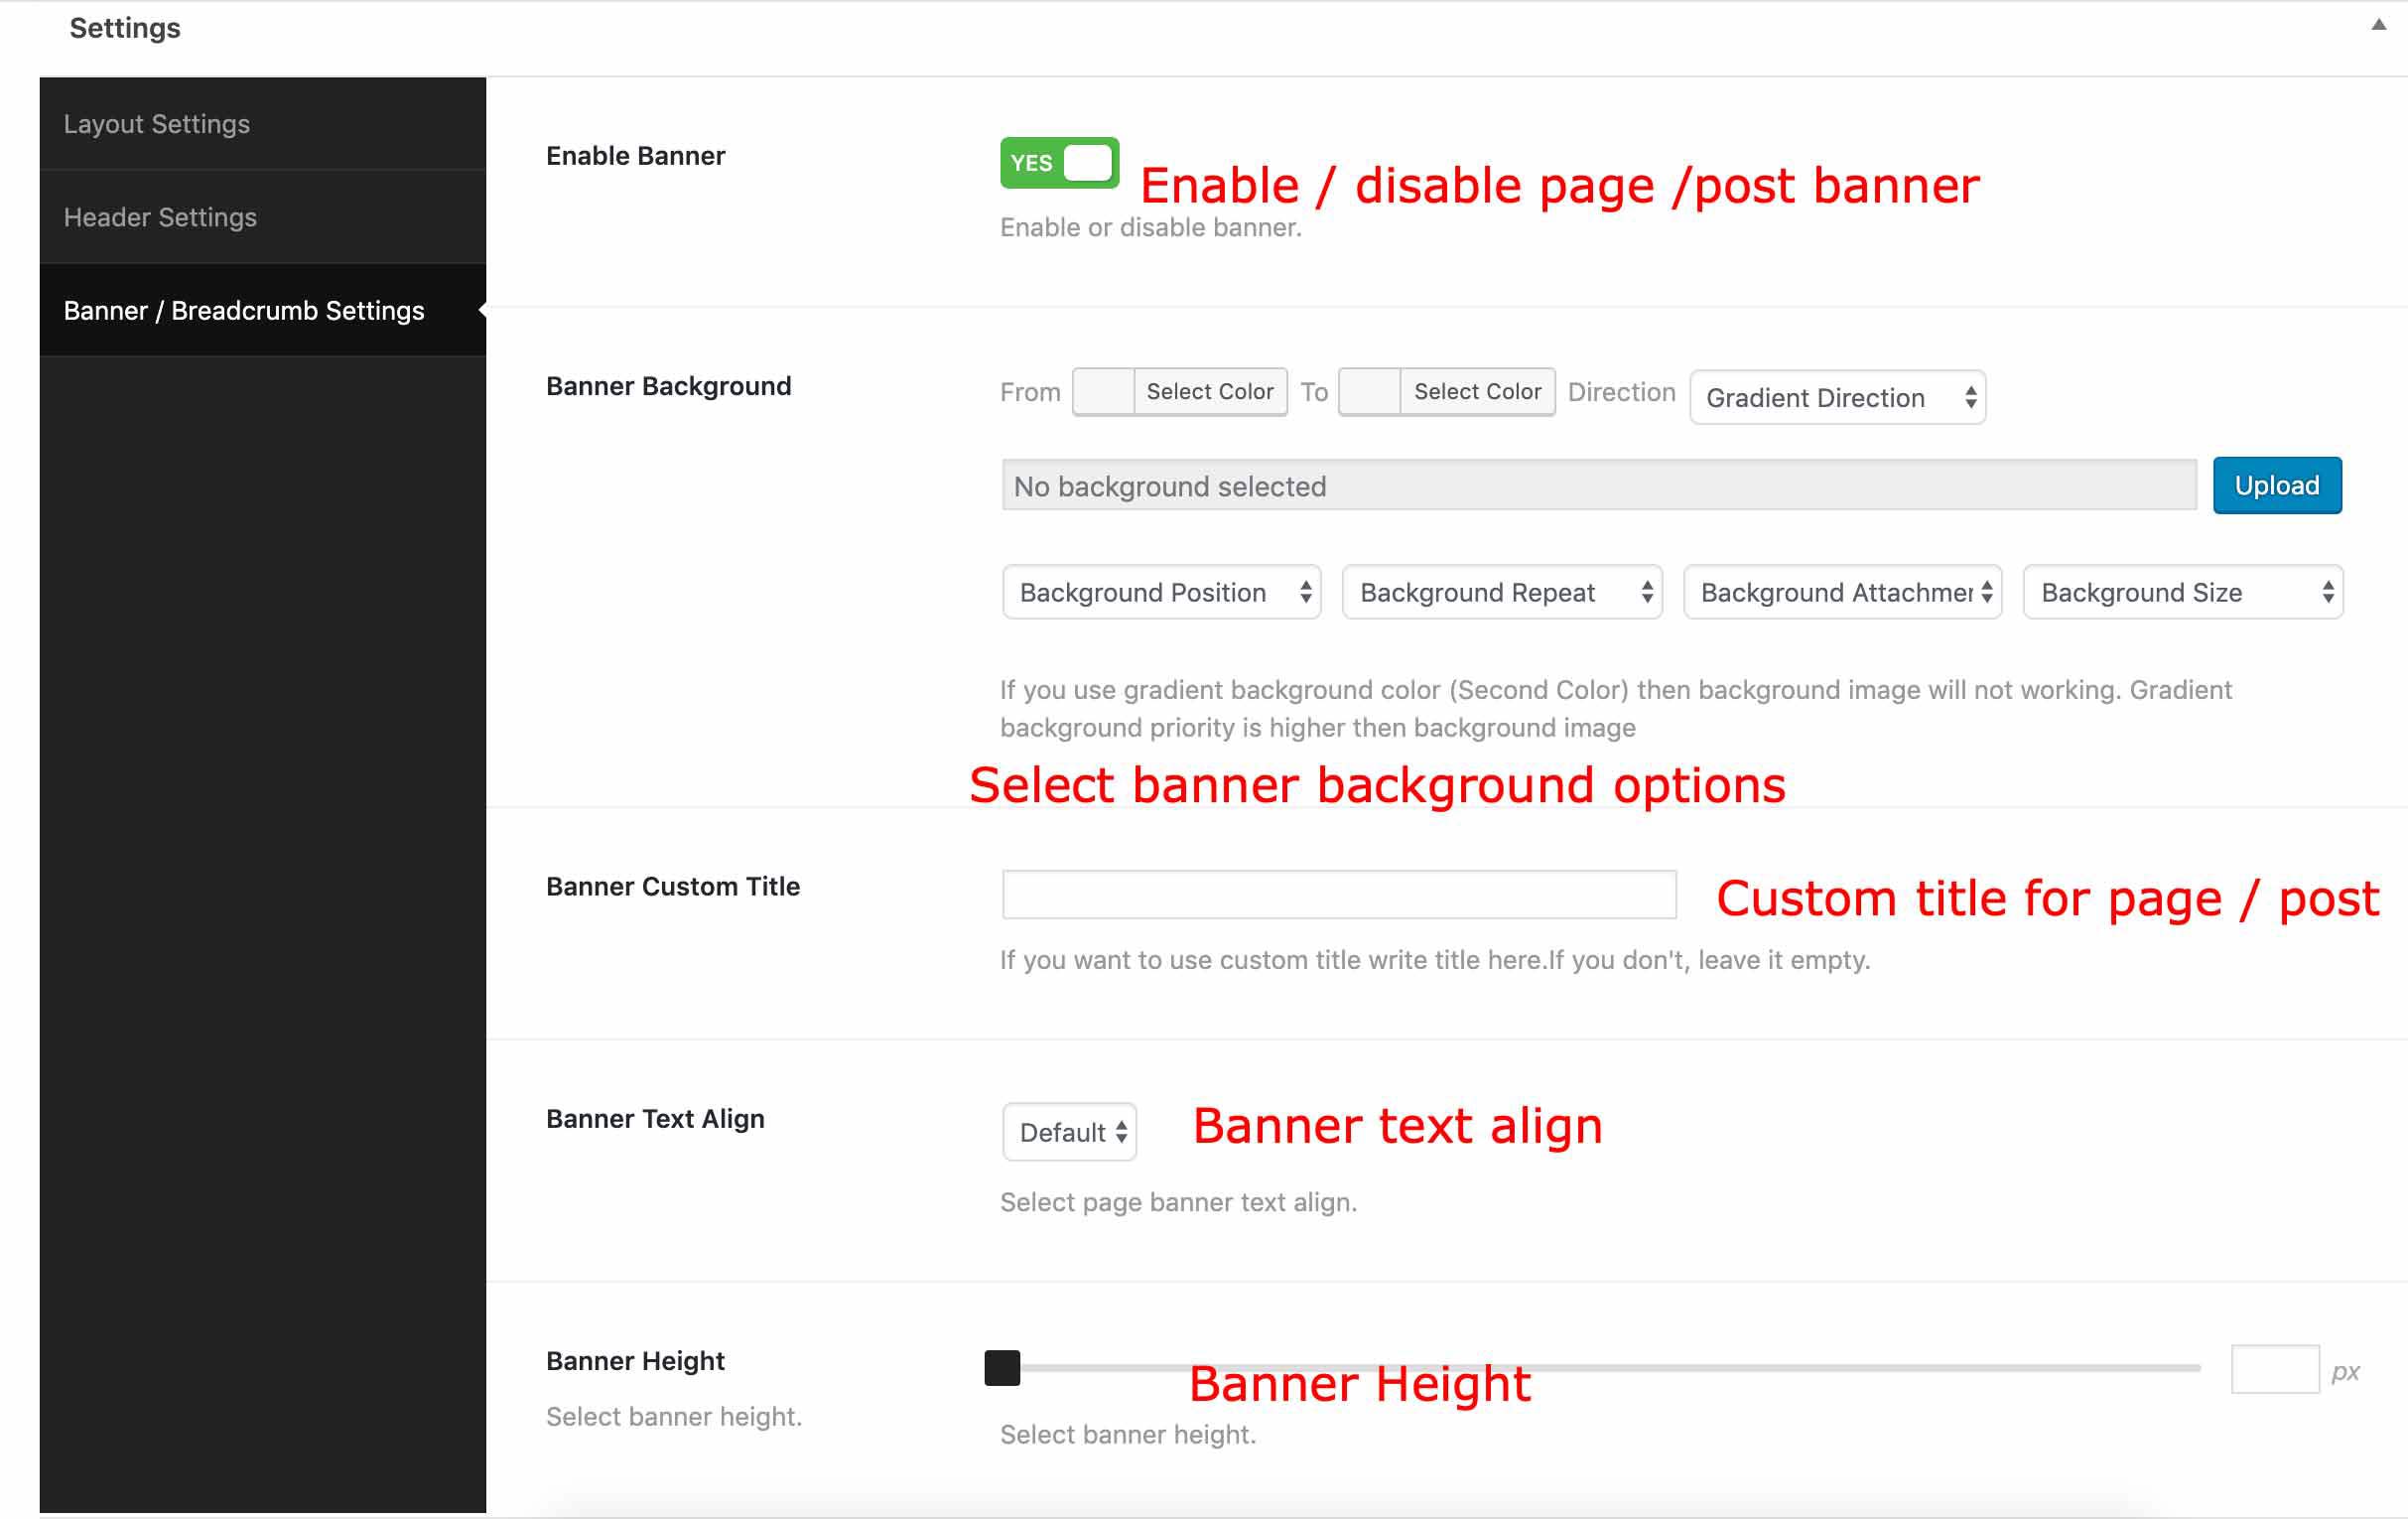
Page / Post / Custom post Settings
When you create or edit a page or post you will see few options for page or post settings on page/post bottom. You can change page/post layout, Header, Footer , hide /show banner, change banner title, images from these metabox options

All Shortcode
Pricing Table
Short Code : [ep_fitness_price_table]
PHP Code : <?php echo do_shortcode('[ep_fitness_price_table ]'); ?>
Signup Form
Short Code : [ep_fitness_form_wizard]
PHP Code : <?php
echo do_shortcode('[ep_fitness_form_wizard ]');
?>
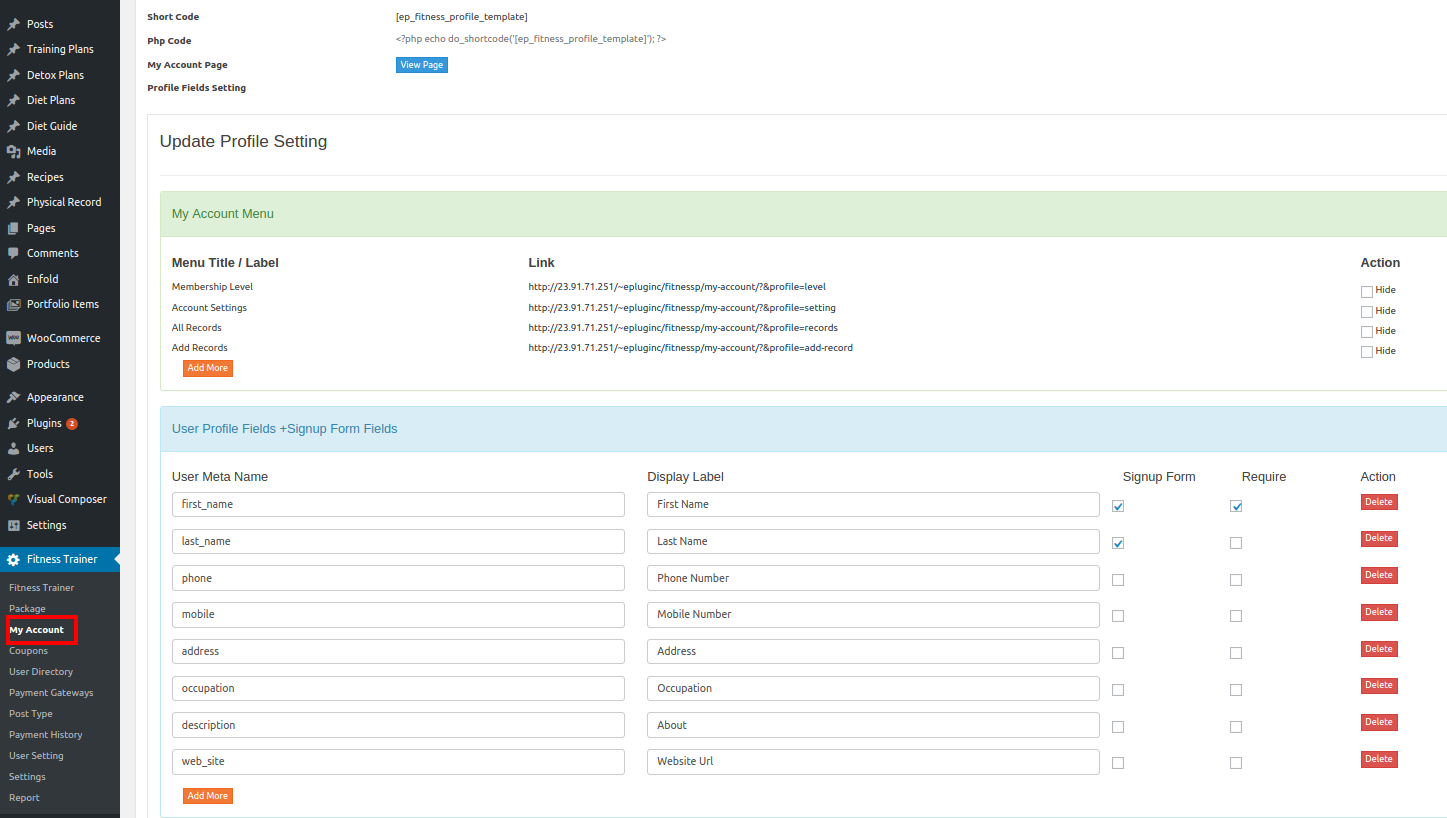
My Account
Short Code : [ep_fitness_profile_template]
PHP Code : <?php
echo do_shortcode('[ep_fitness_profile_template ]');
?>
Login
Short Code : [ep_fitness_login]
PHP Code : <?php
echo do_shortcode('[ep_fitness_login ]');
?>
User Directory
Short Code : [ep_fitness_user_directory]
PHP Code : <?php
echo do_shortcode('[ep_fitness_user_directory ]');
?>
Public Profile
Short Code : [ep_fitness_profile_public]
PHP Code : <?php
echo do_shortcode('[ep_fitness_profile_public ]');
?>
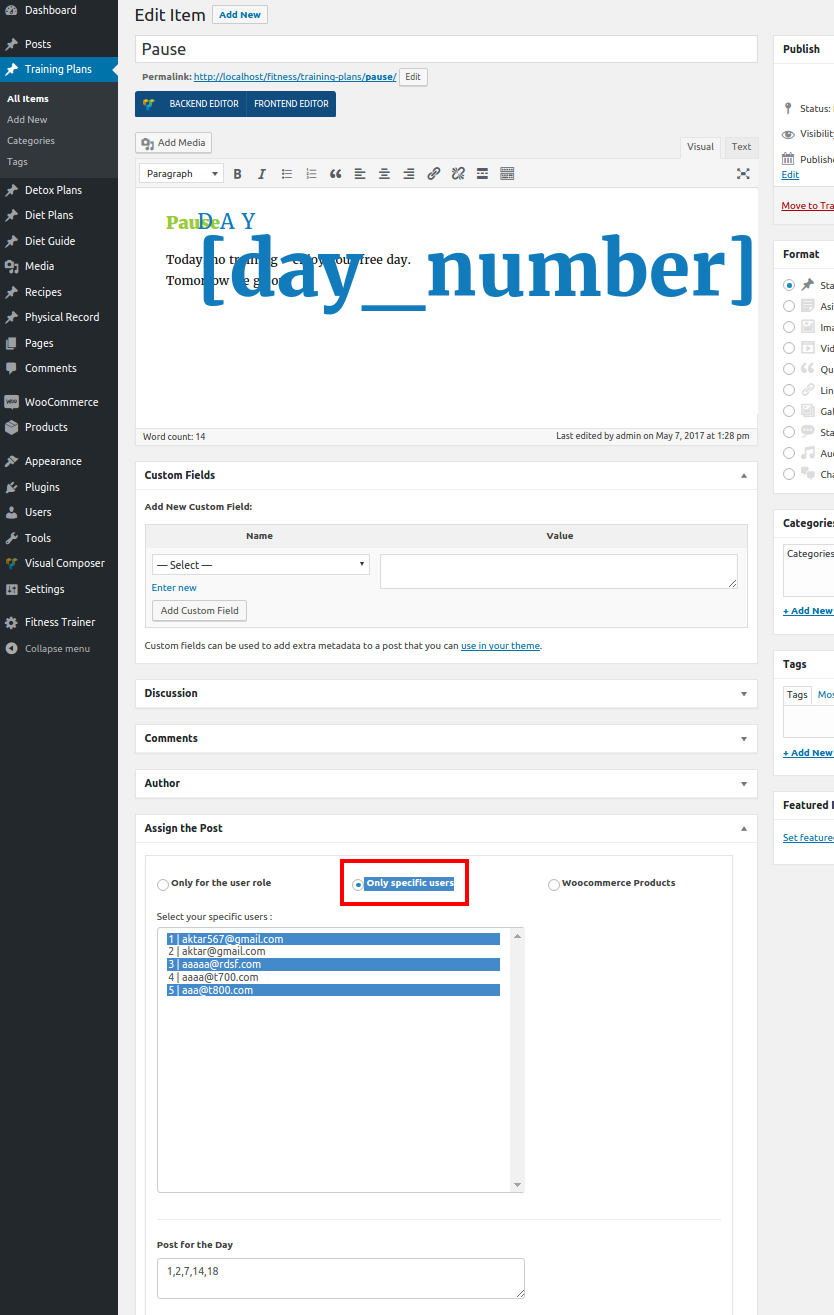
Content Protection
You can protect or share custom post type content( Training, Detox paln, Diet Plan, Diet Guide etc.)
1. Protect Content By User Role
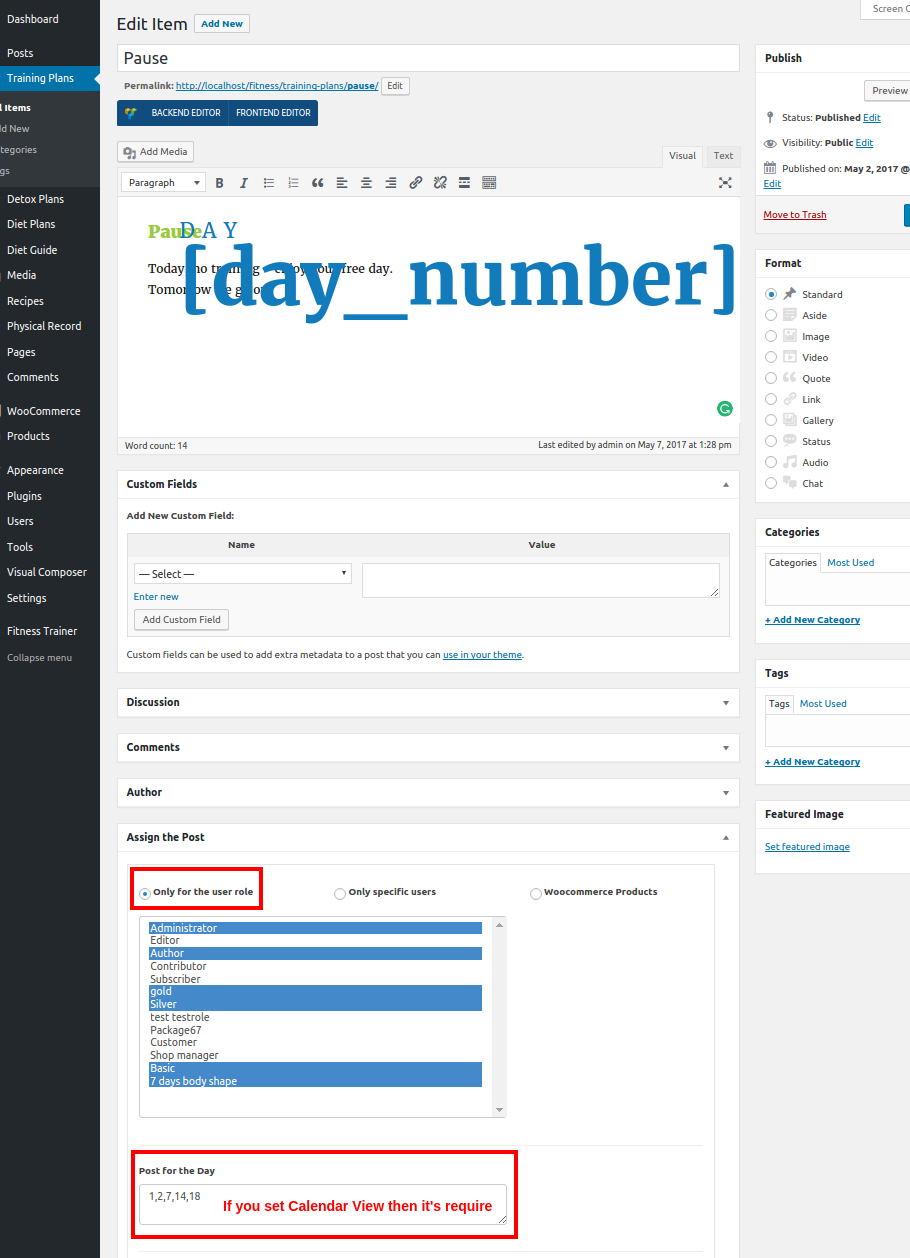
2. Protect Content By Woocommerce Product. It will work when a customer buy the product.
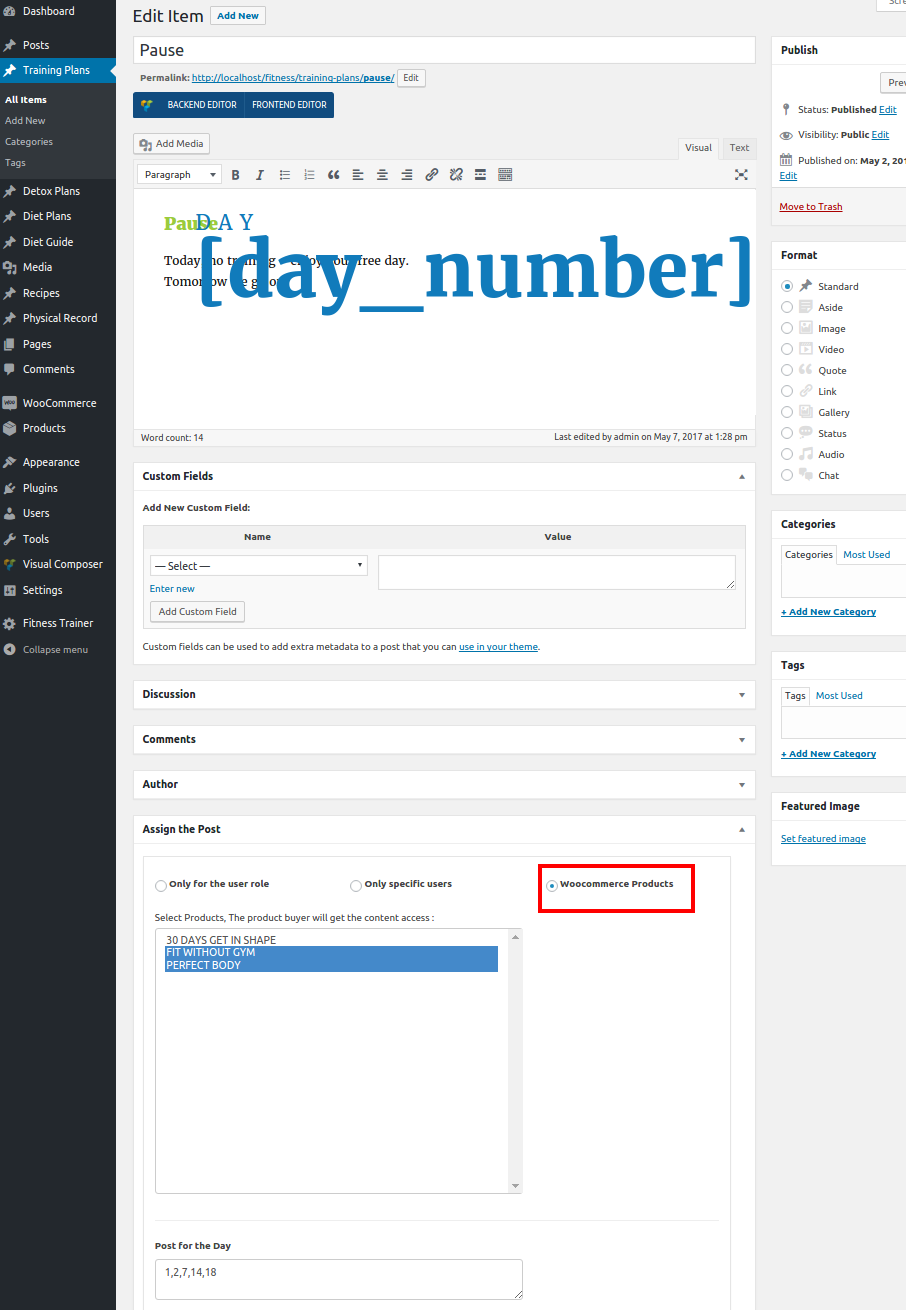
3. Protect Content By specific users.
Change Languages
Use the plugin
https://wordpress.org/plugins/loco-translate/
OR
1. Please download the software http://poedit.net/
2. Open file epfitness/language/xxxx.po by the software.
3. Change text to your language by the poedit software and save.
Woocommerce Payment Integration
You need 3 steps to add woocommerce payment gateway
STEP 1 : Create woocommerce Product/Subscription
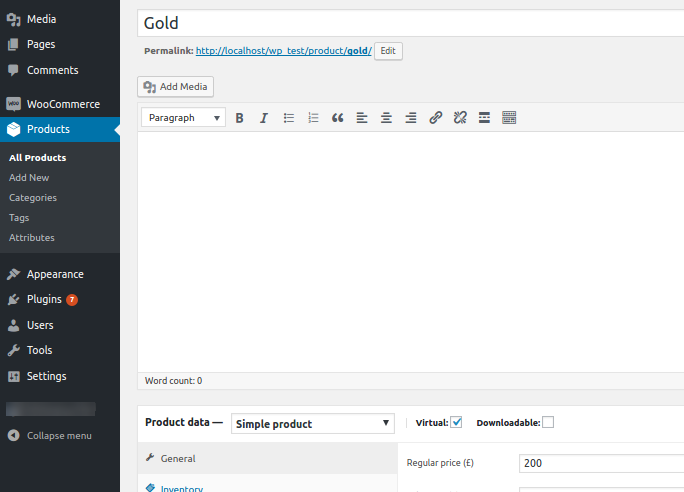
STEP 2 : Select Woocommerce Payment Gateway from plugin setting-> Payment gateway

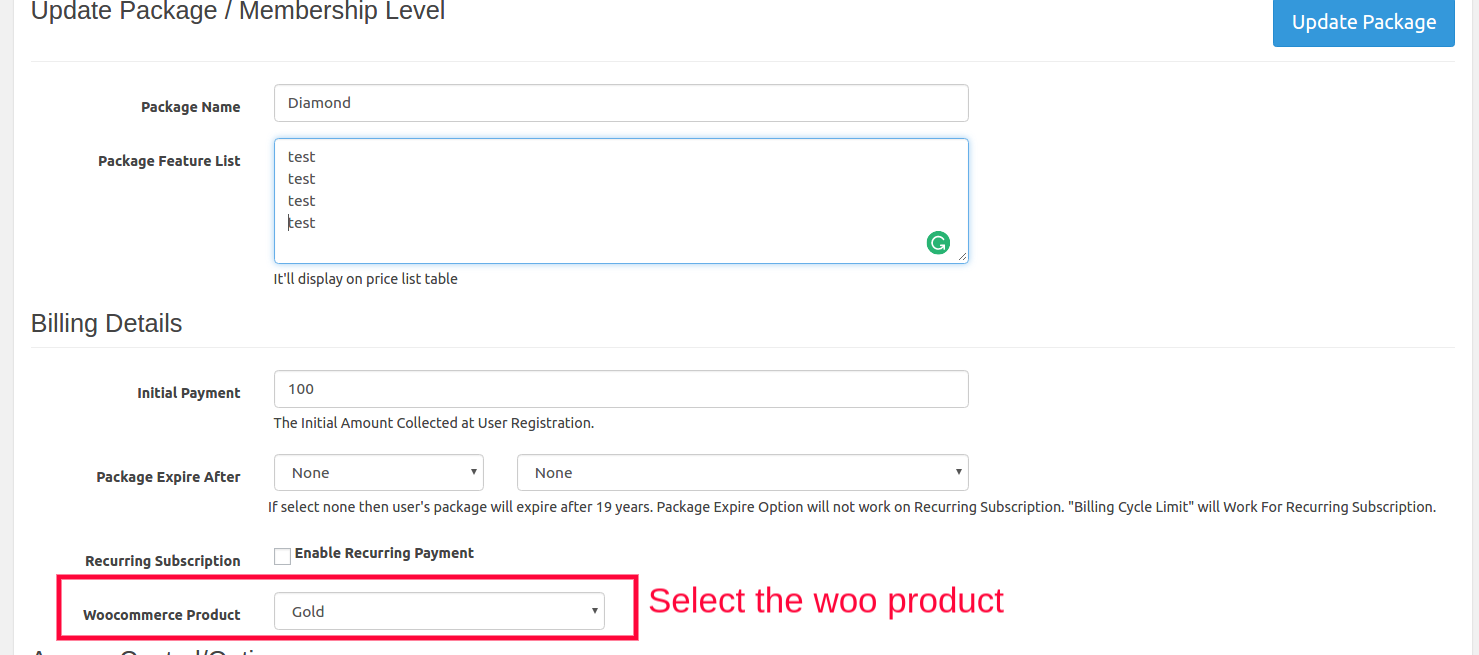
STEP 3 : Create /Edit Package & select a woocommerce product
Now User can use woocommerce payment gateway from plugin "User Registration" page.
The woocommerce oder status will be "Processing".
When site admin set "Completed" the oder status then the user role will change(When the user try to login).
If you want auto complate order status then use the plugin : https://wordpress.org/plugins/woocommerce-autocomplete-order/
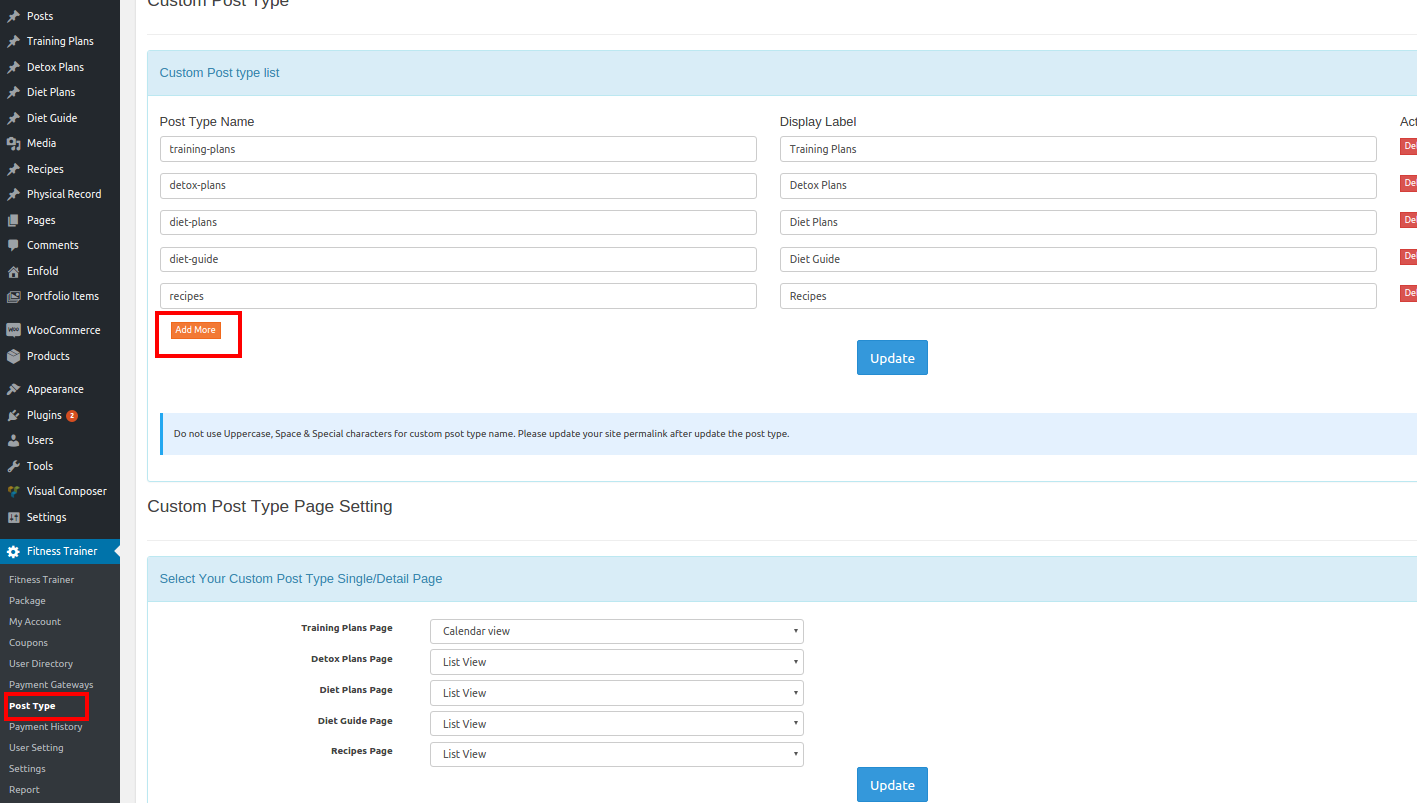
Change Custom Post Type
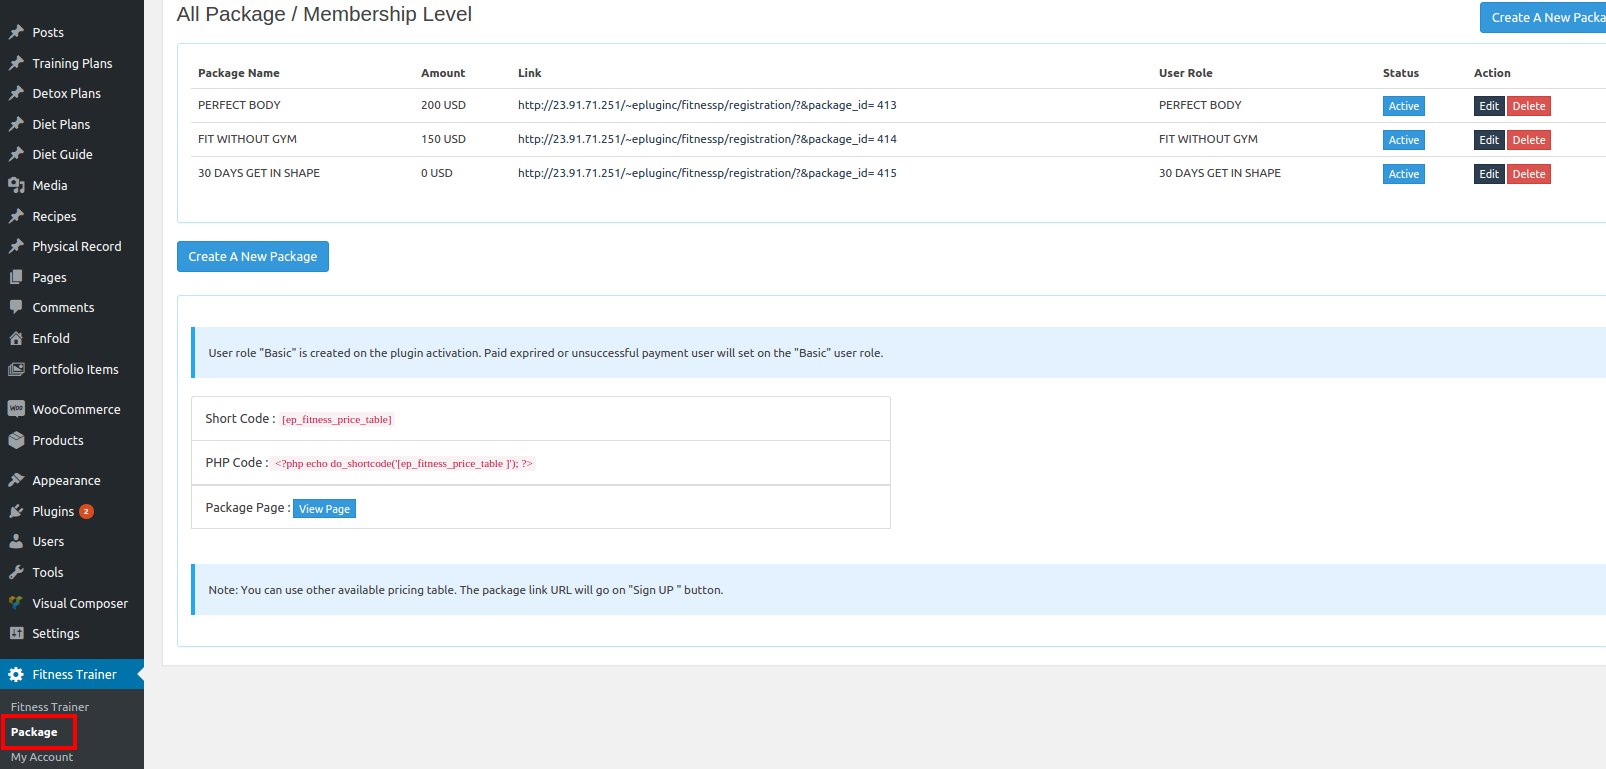
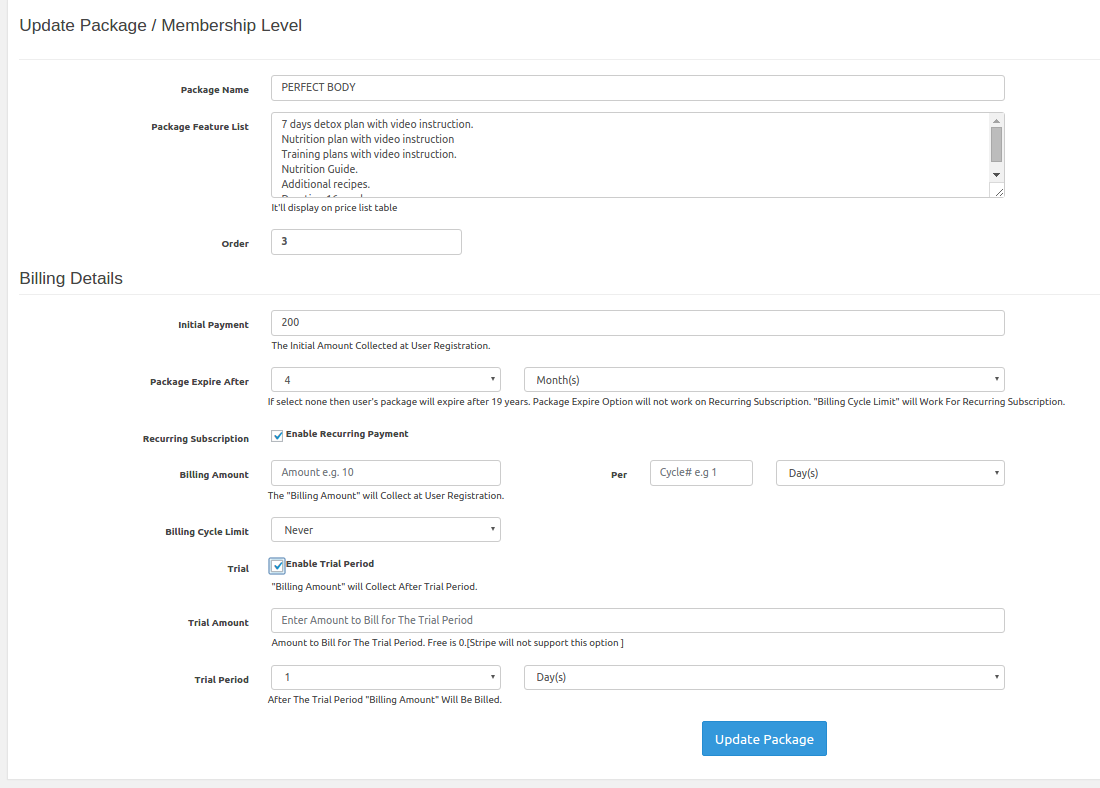
Package
Admin can create unlimited package.
User role "Basic" will create on the plugin activation.
The "Basic" role has only file upoload privilege.
For under the package user will get the package role [upload pic, add post, edit post].
After cancel or unsuccesful payment it will convert to "Basic" Role.
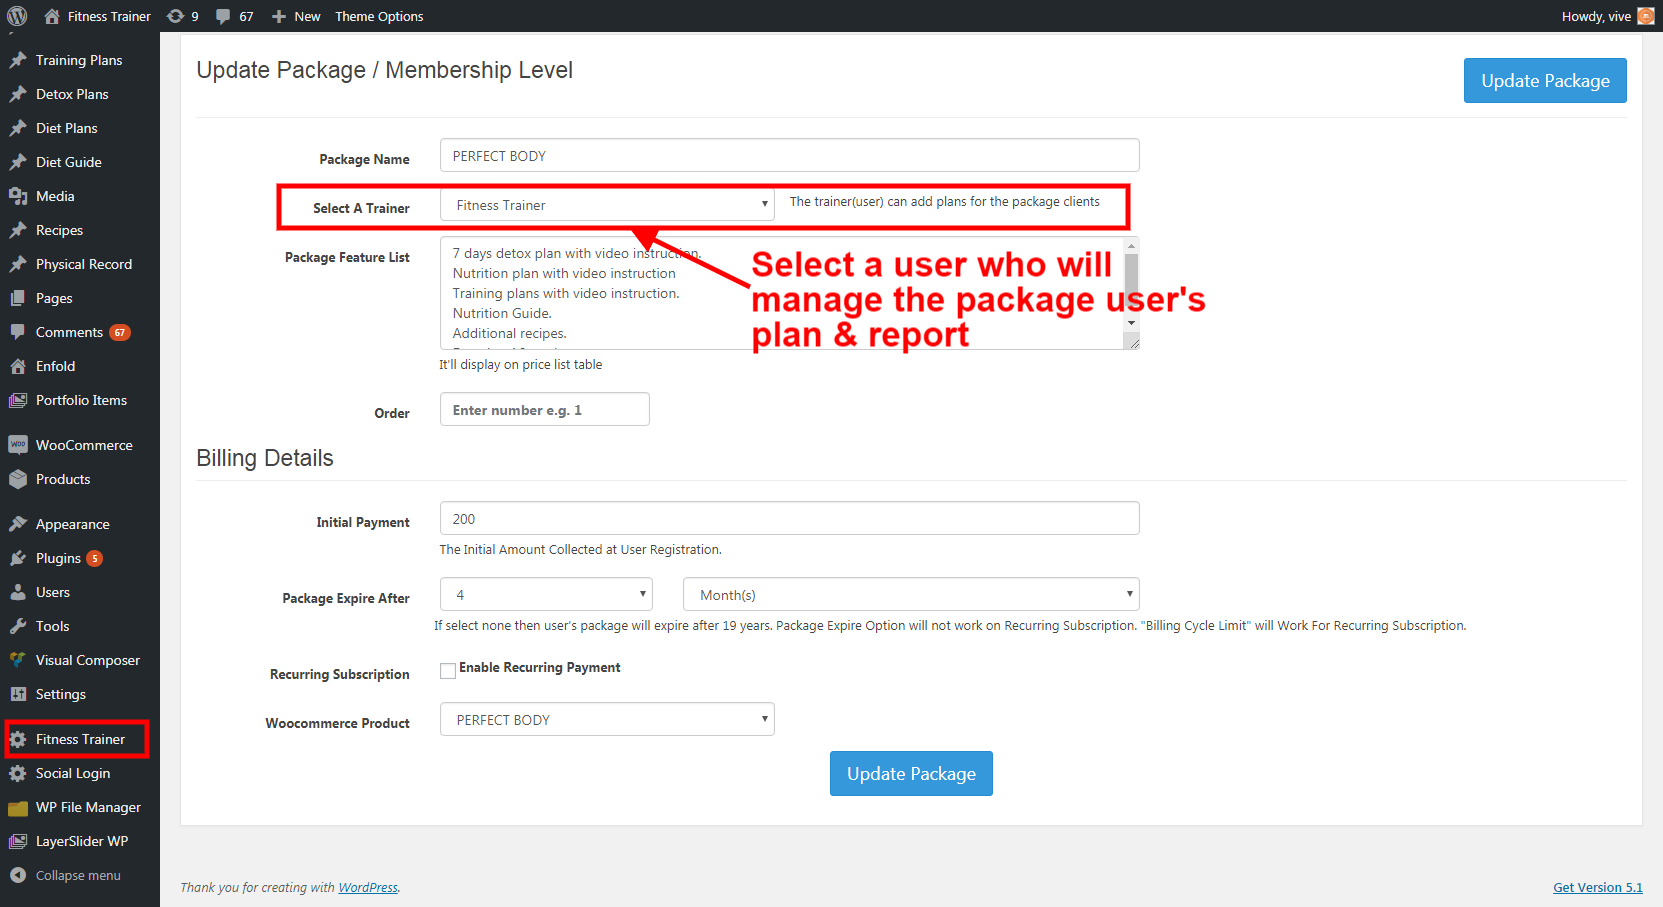
Package for multiple Trainer
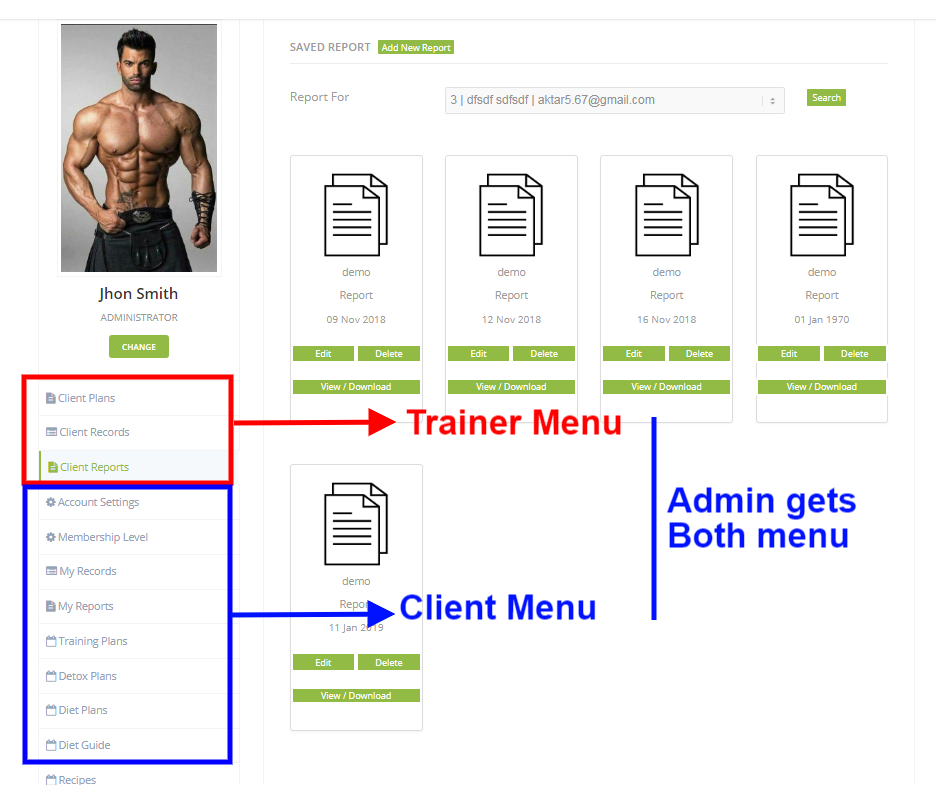
Trainer & Client/user front-end Menu
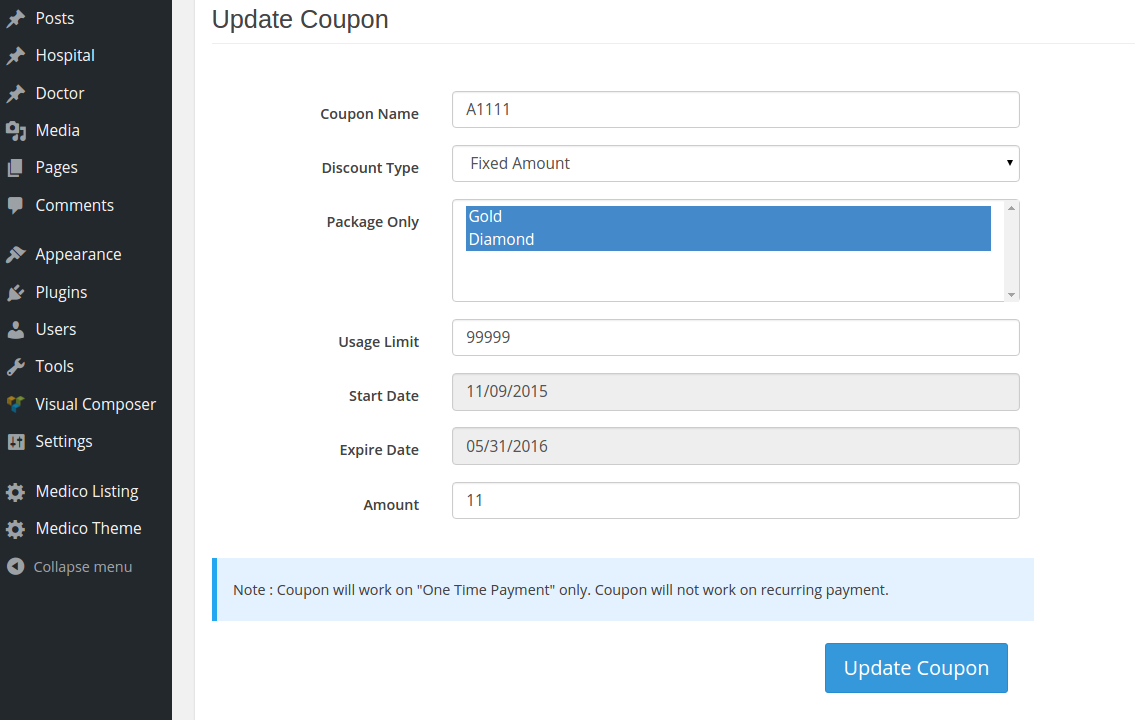
Coupon
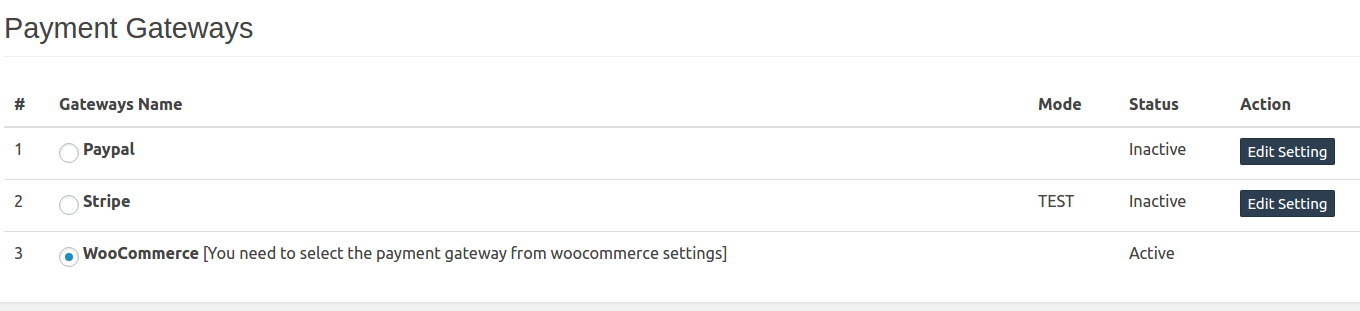
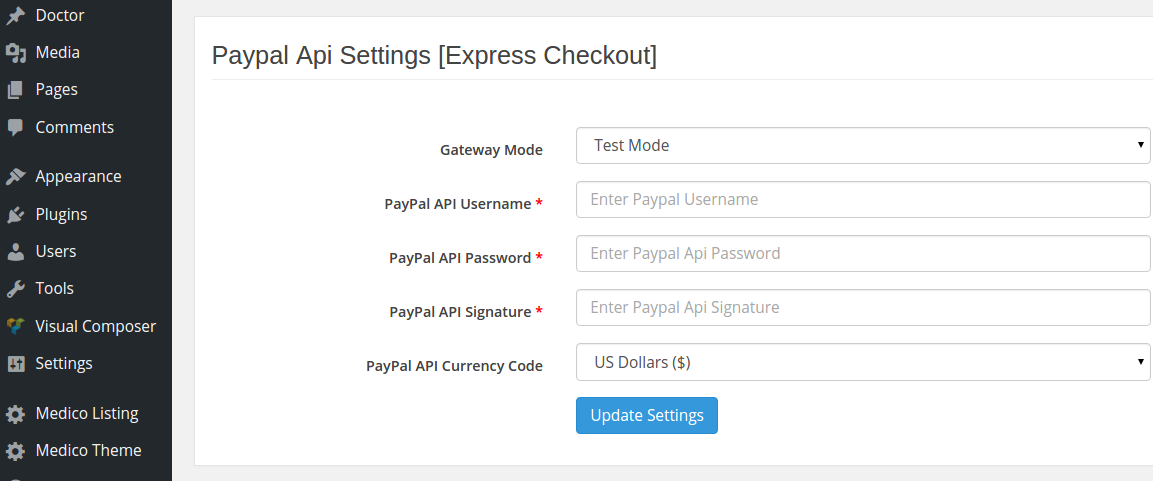
Payment Gateways
SignUp + Profile Fields
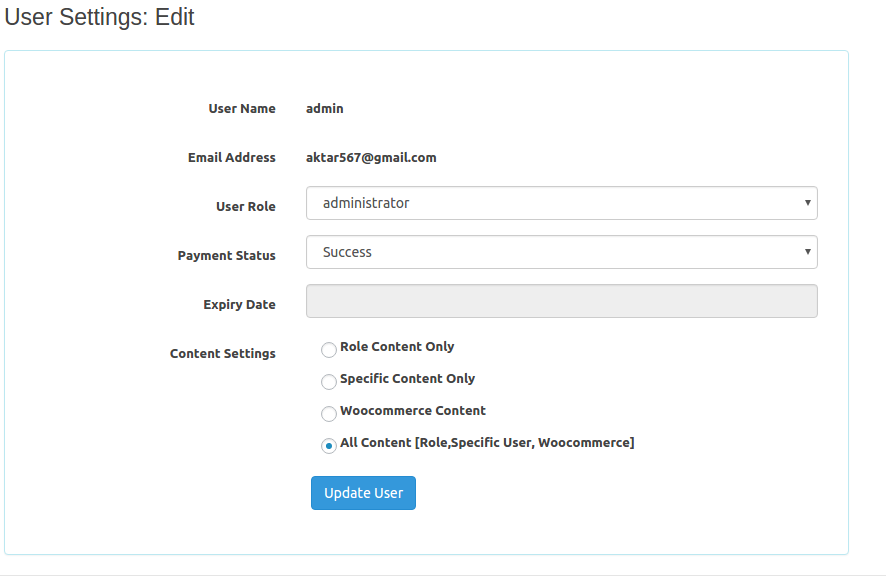
User Setting
Admin can change user's role , expire date and payment status.
Record Fields Setting
Admin can change record fields.

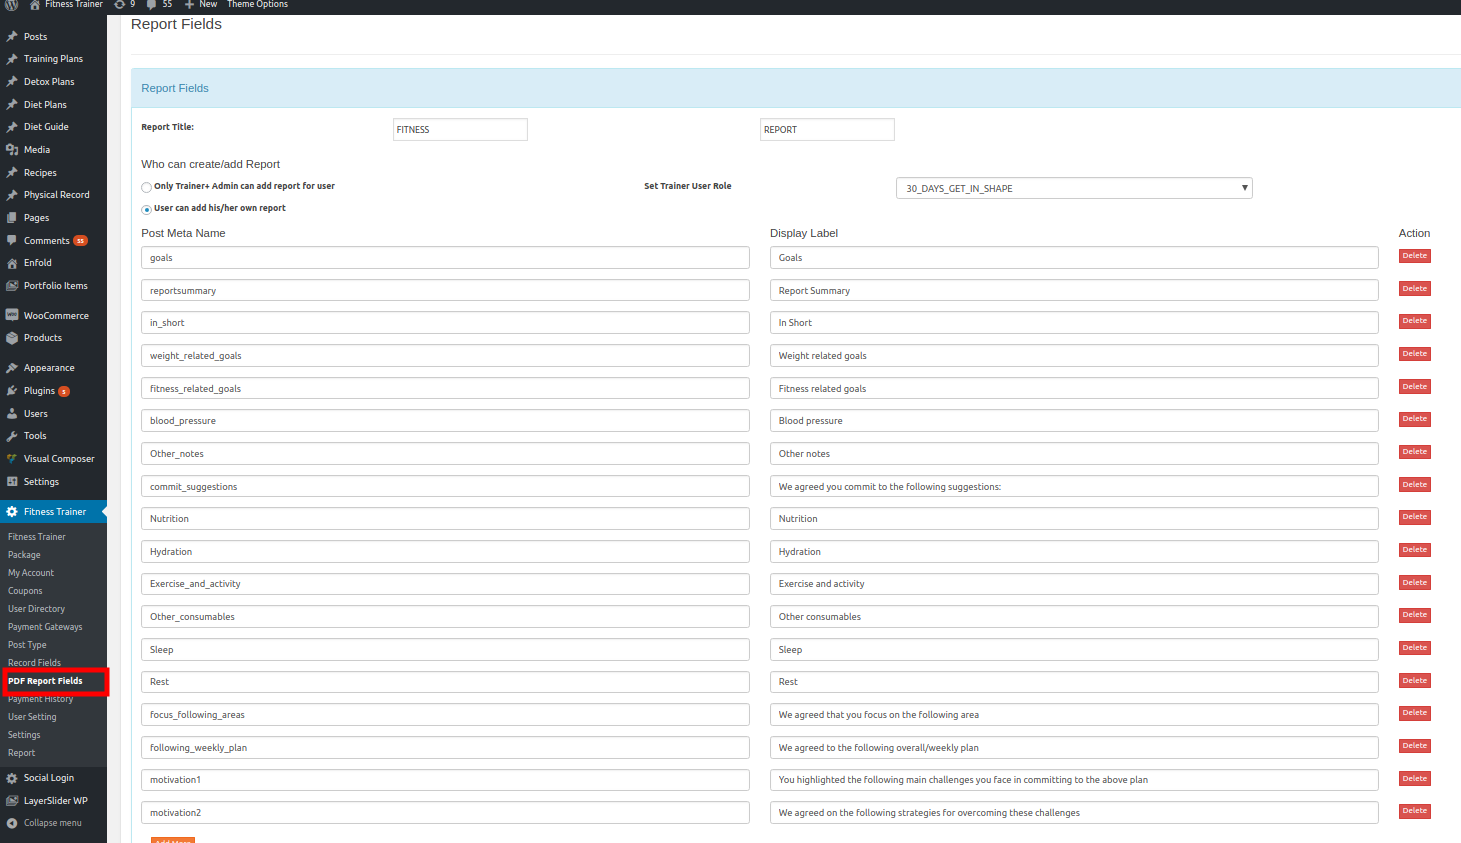
Report Fields Setting
Admin can change report fields.
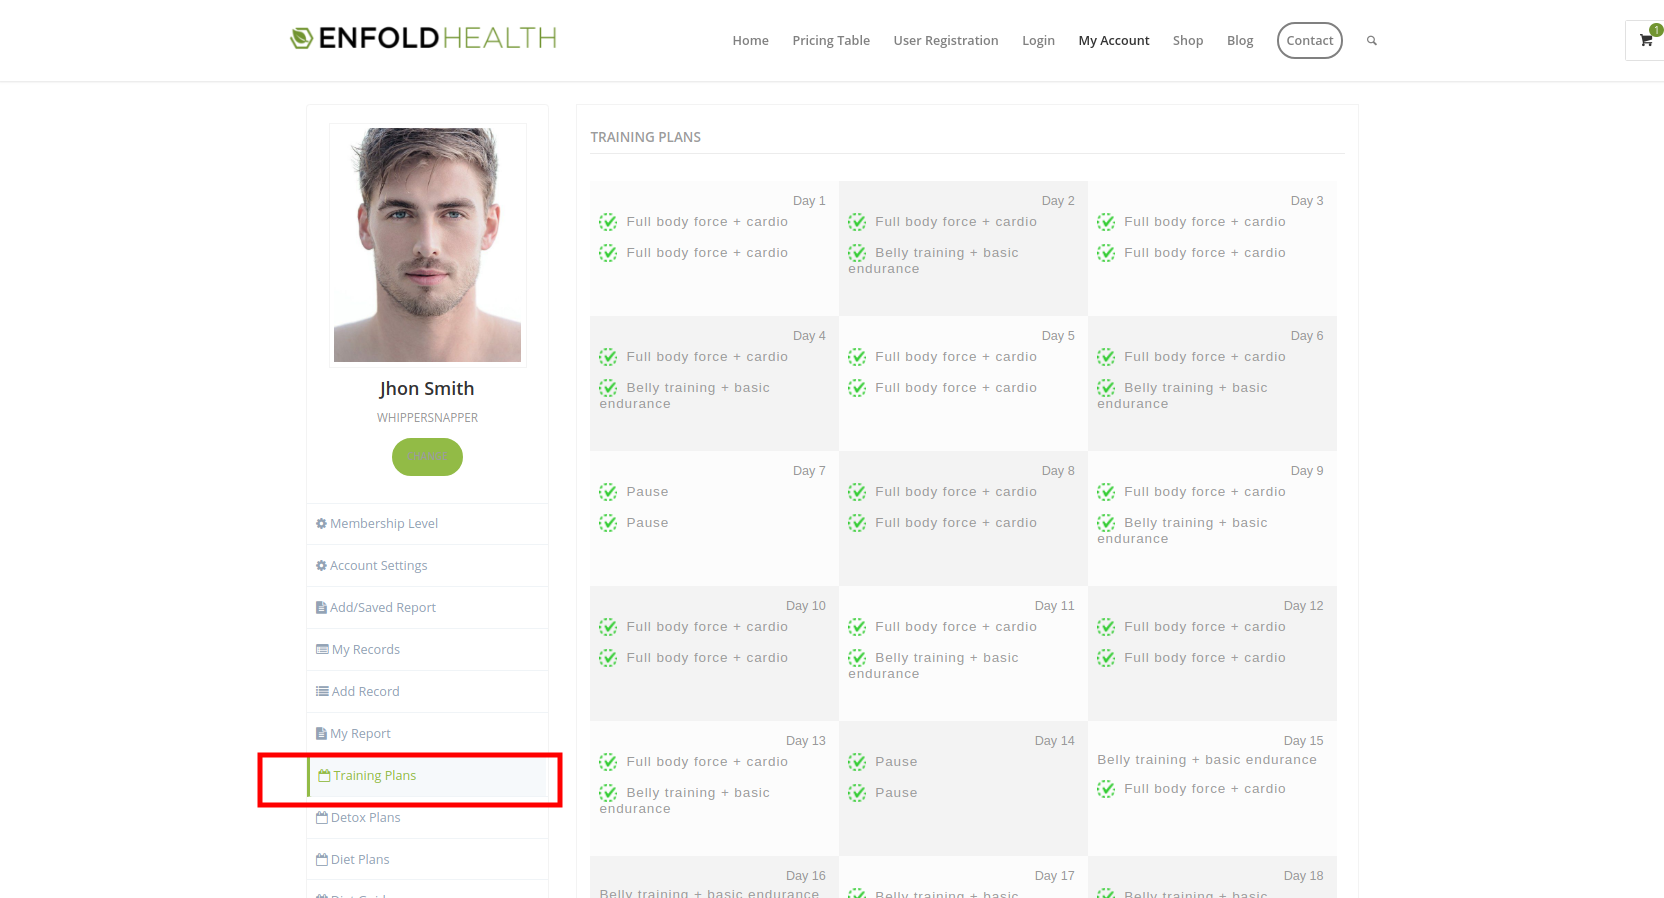
My Account/User Workout
User can see his/her workout plan
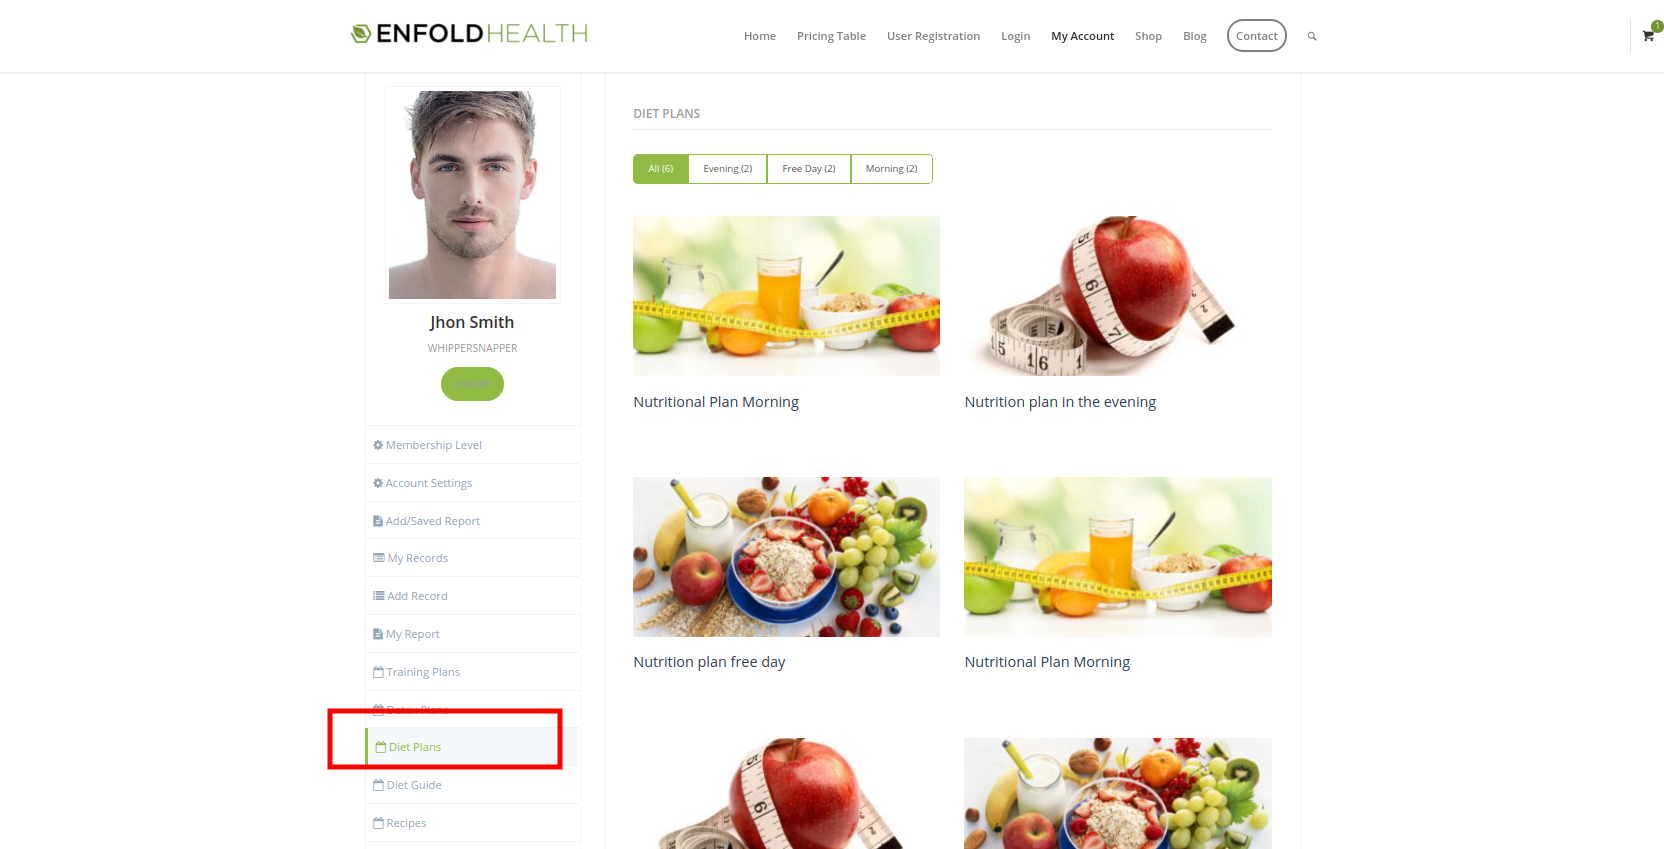
My Account/User Diet Plan
User can see his/her diet plan
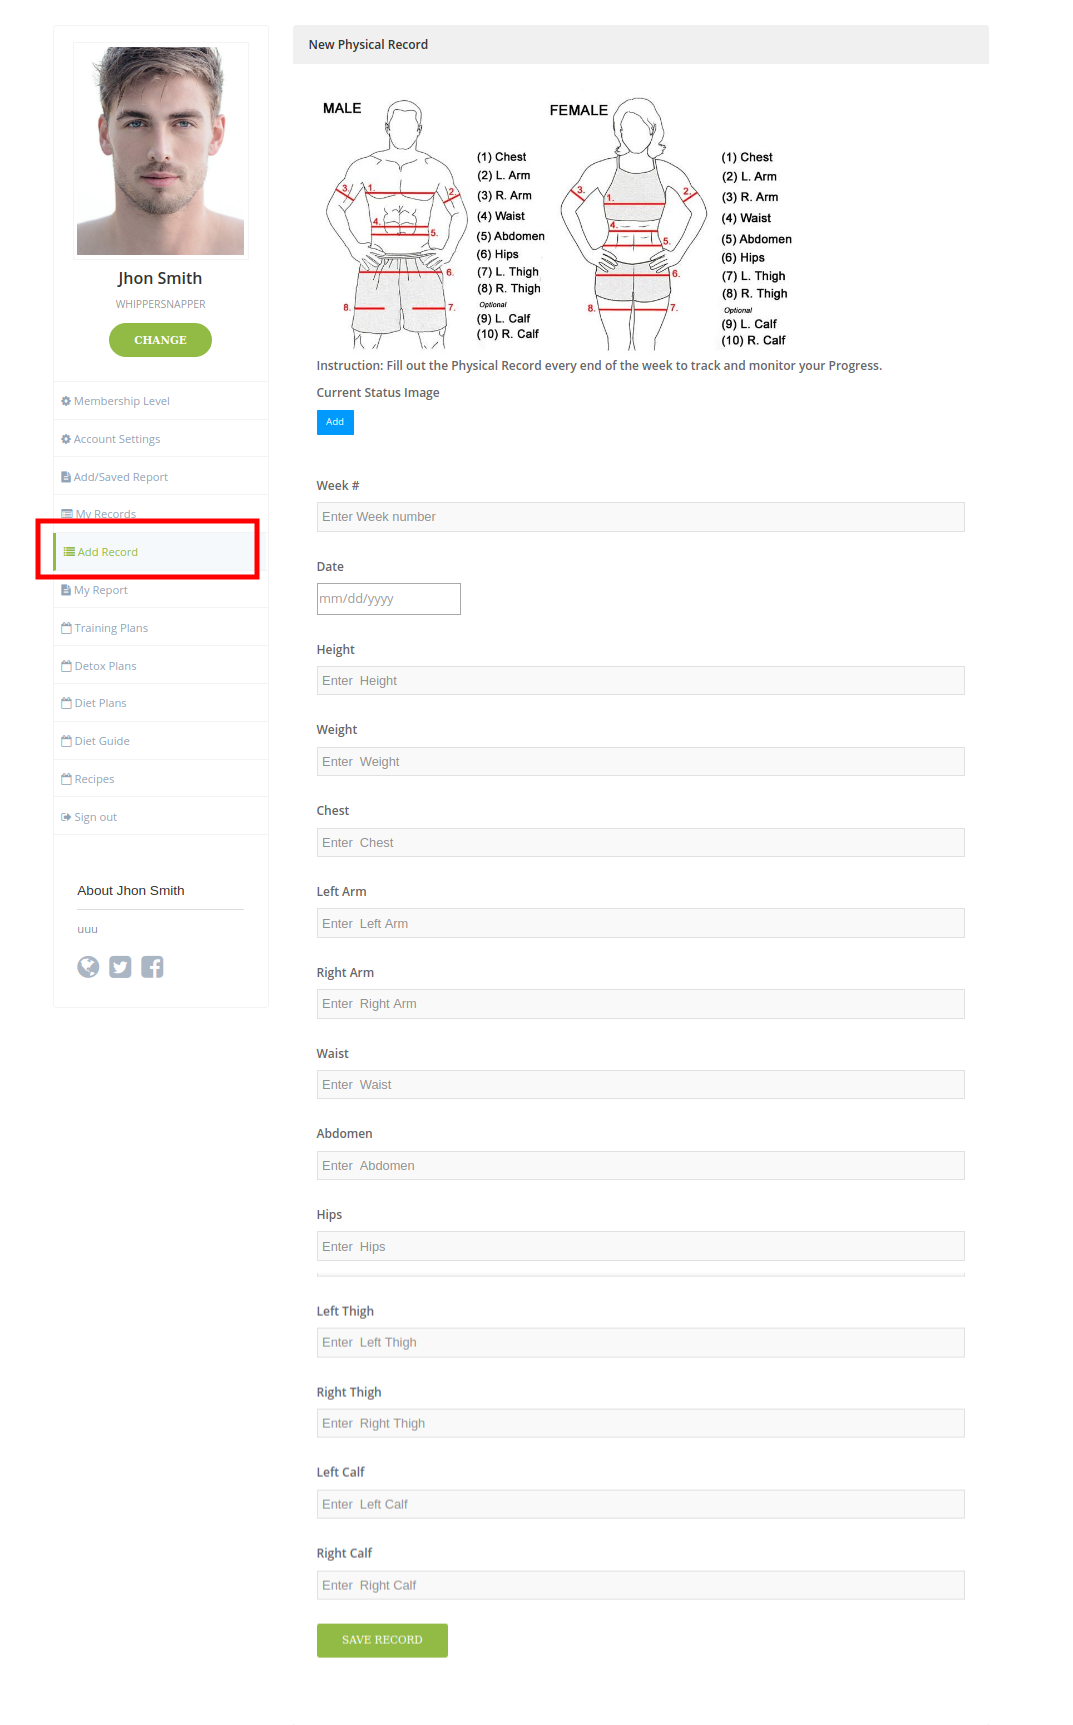
My Account/User Add Physical Record
User can add/edit his/her Physical Record
My Account/User View Physical Record
User can see his/her Physical Record
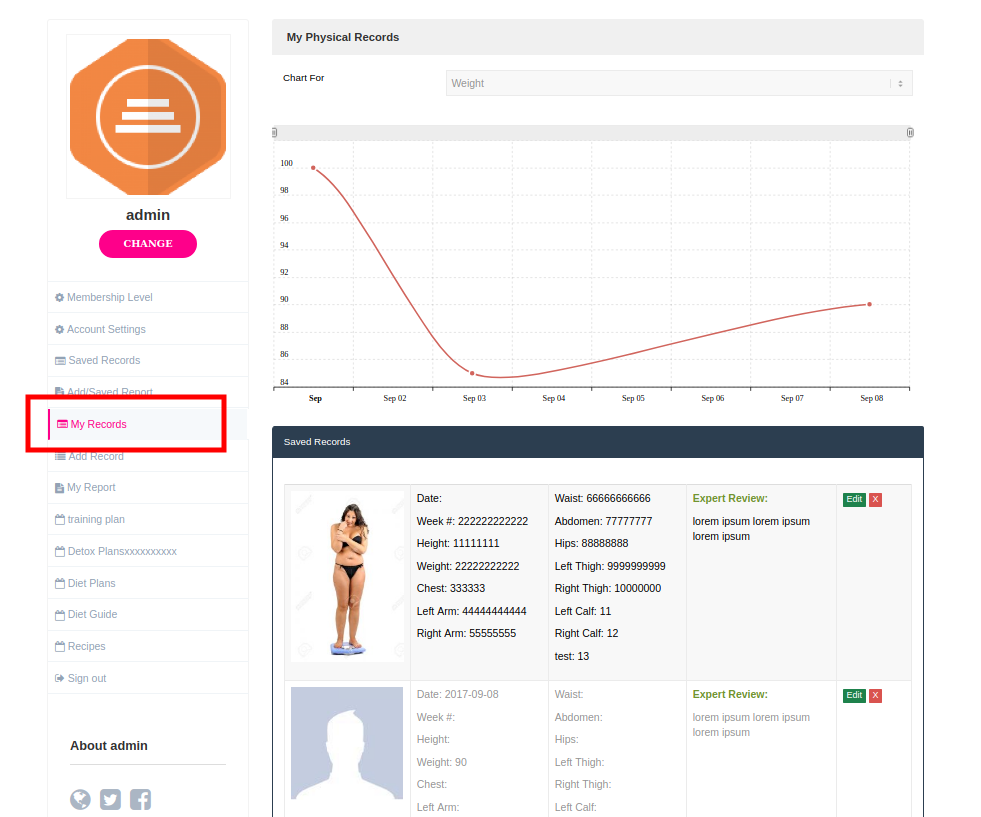
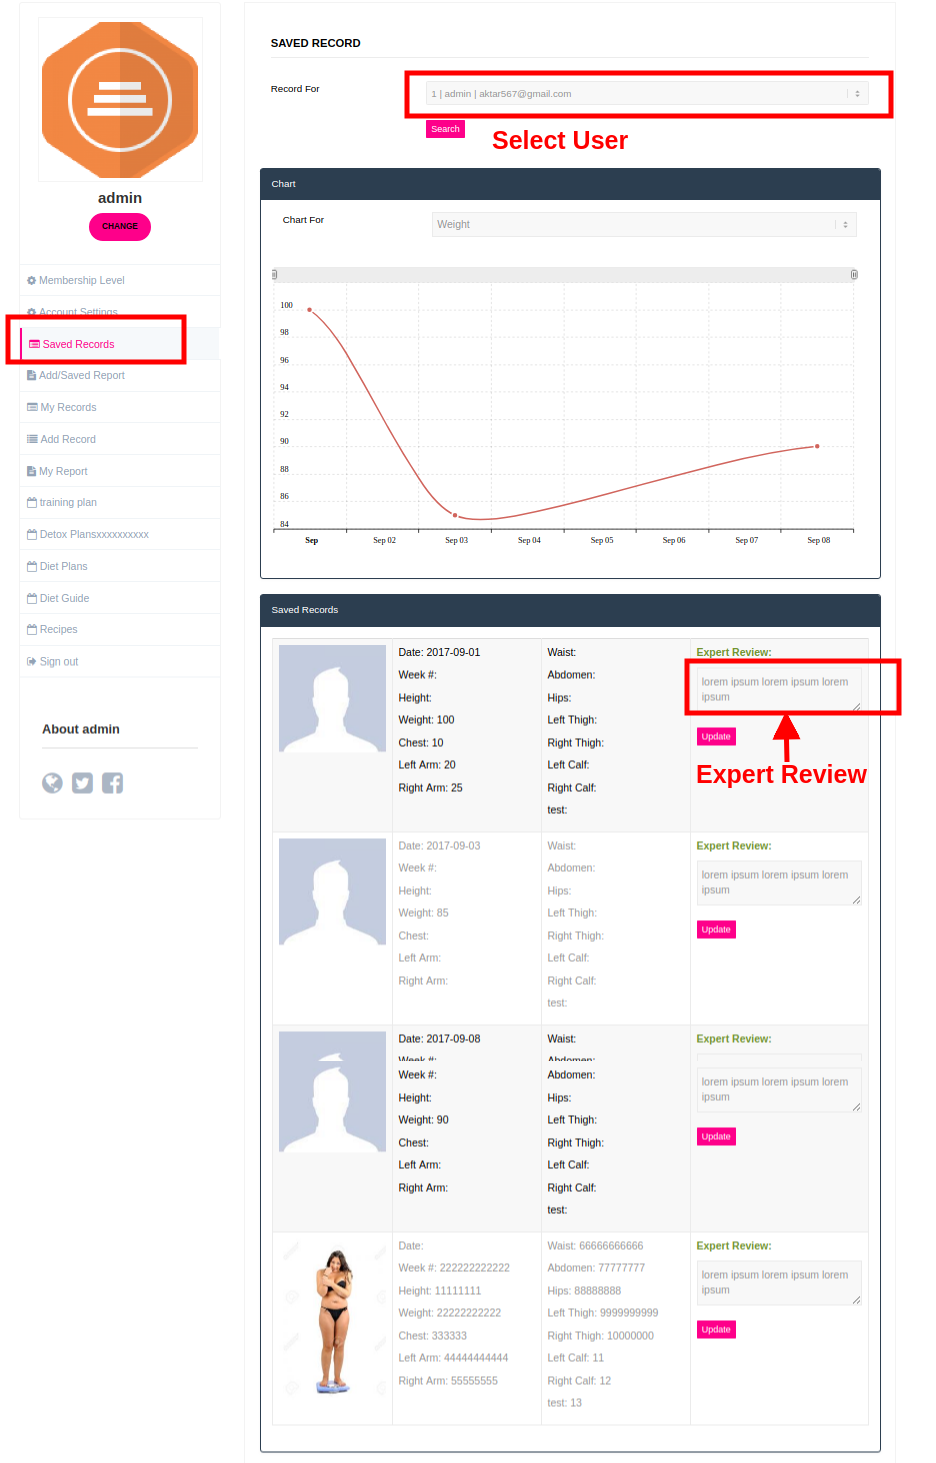
Admin/expert Review
Admin/expert can view Physical Record and add comments for the record
My Account/User Add Report
User can add his/her Report

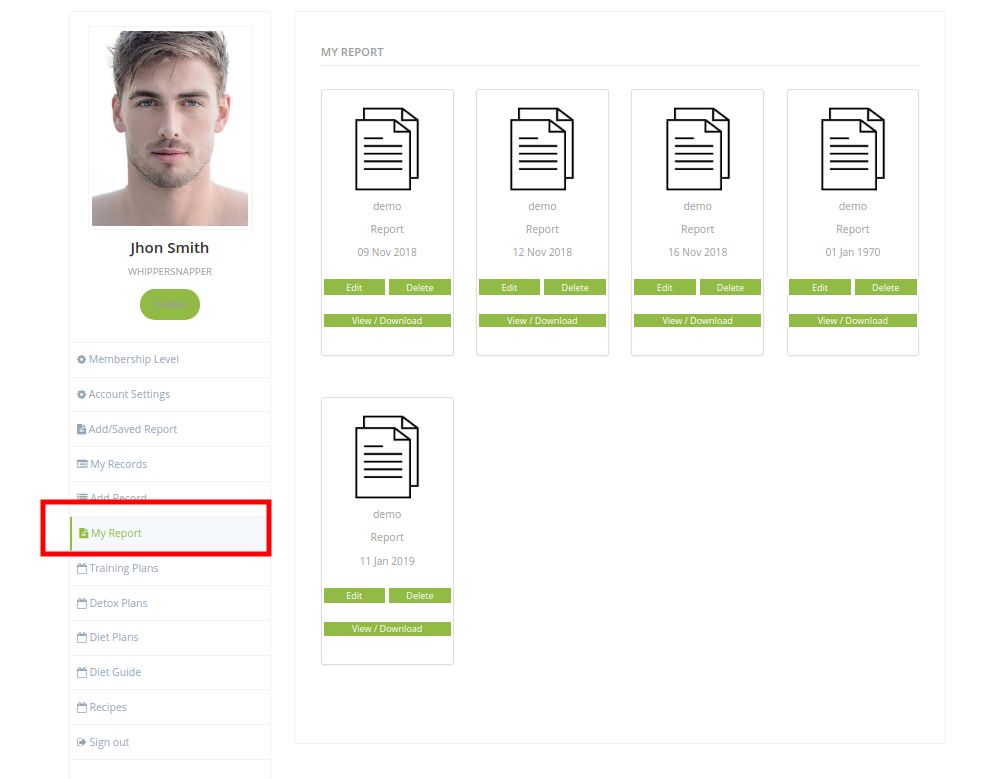
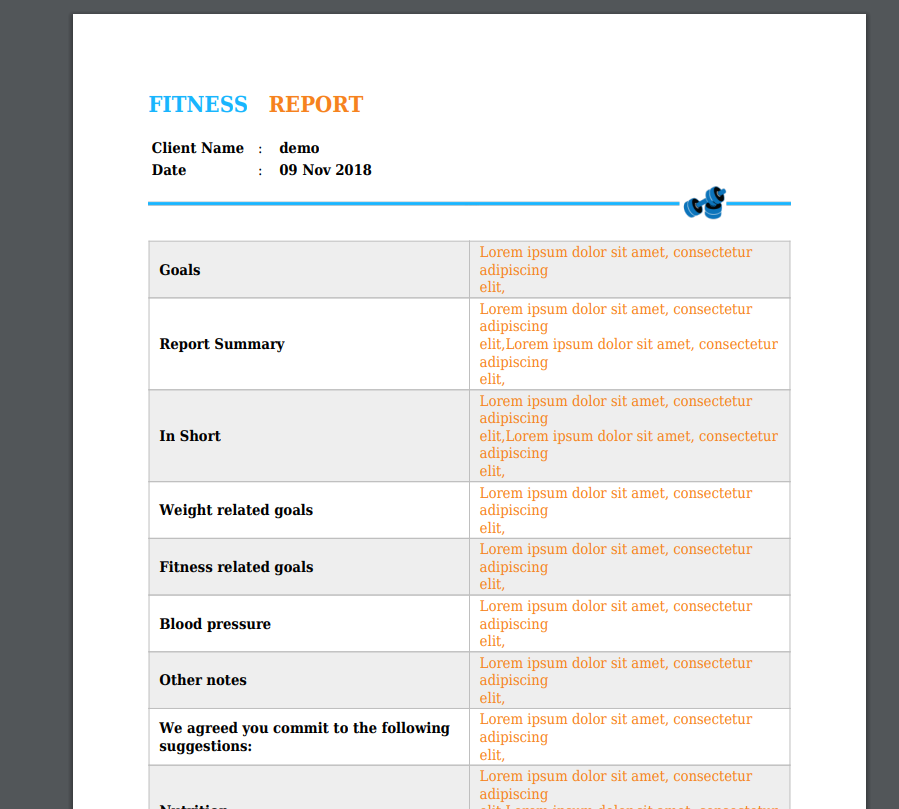
My Account/User View Report
User can view his/her Report
Page Setting
The Plugin will creates pages when it will active.

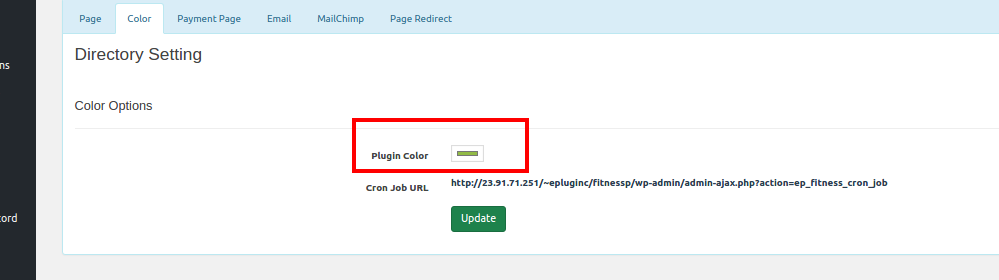
Color Setting
Admin can change color.
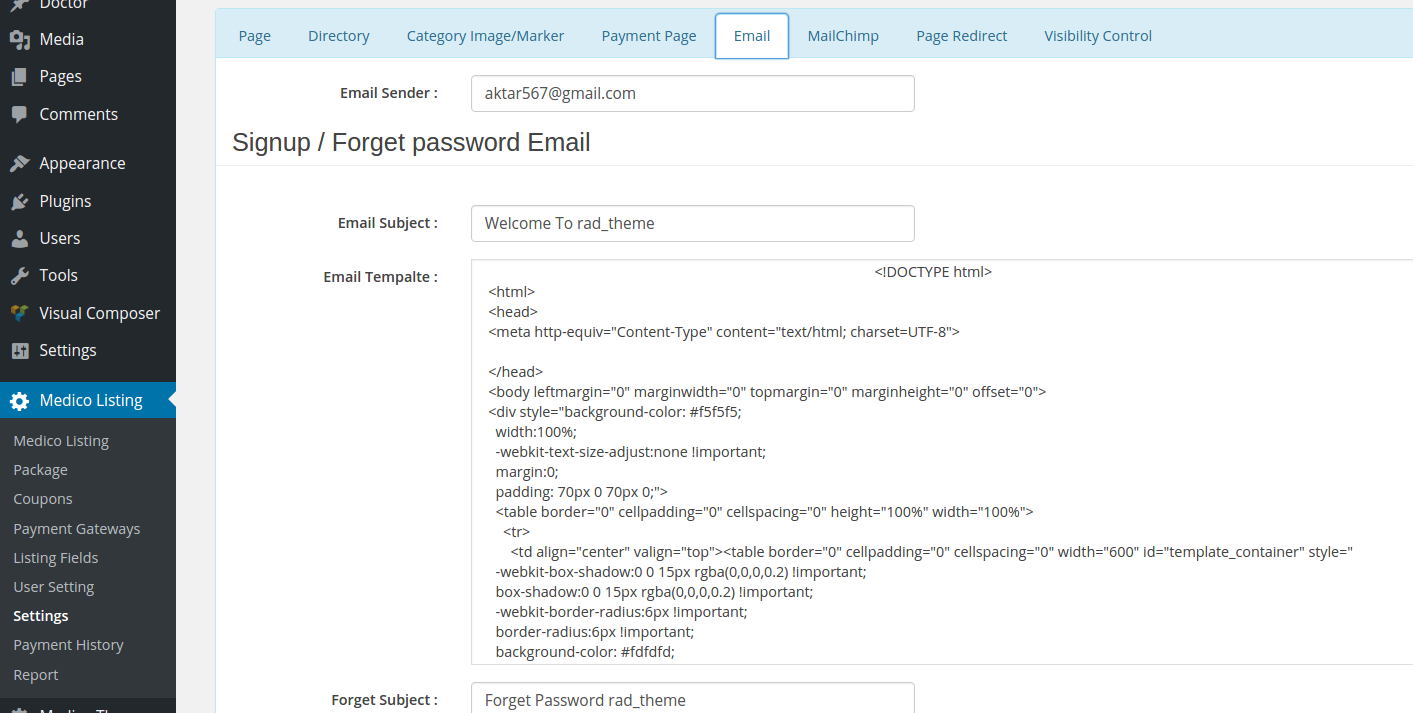
Email Template
This is email template page. You can edit the template.
List of email Template
1. Signup email
2. Forgot password email
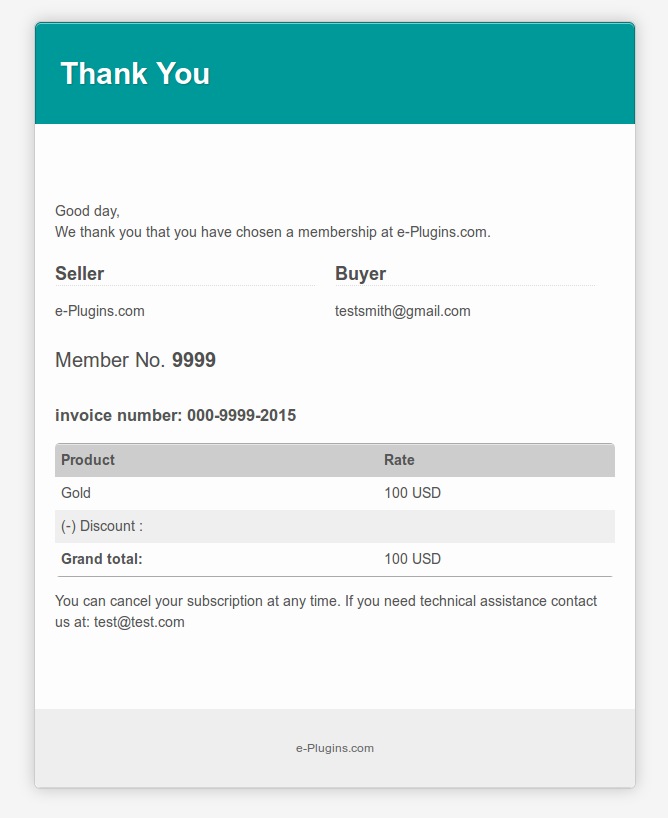
3. Payment invoice email
4. Listing Contact emai client + admin
5. Contact us Admin email
6. Contact us user Auto replu email
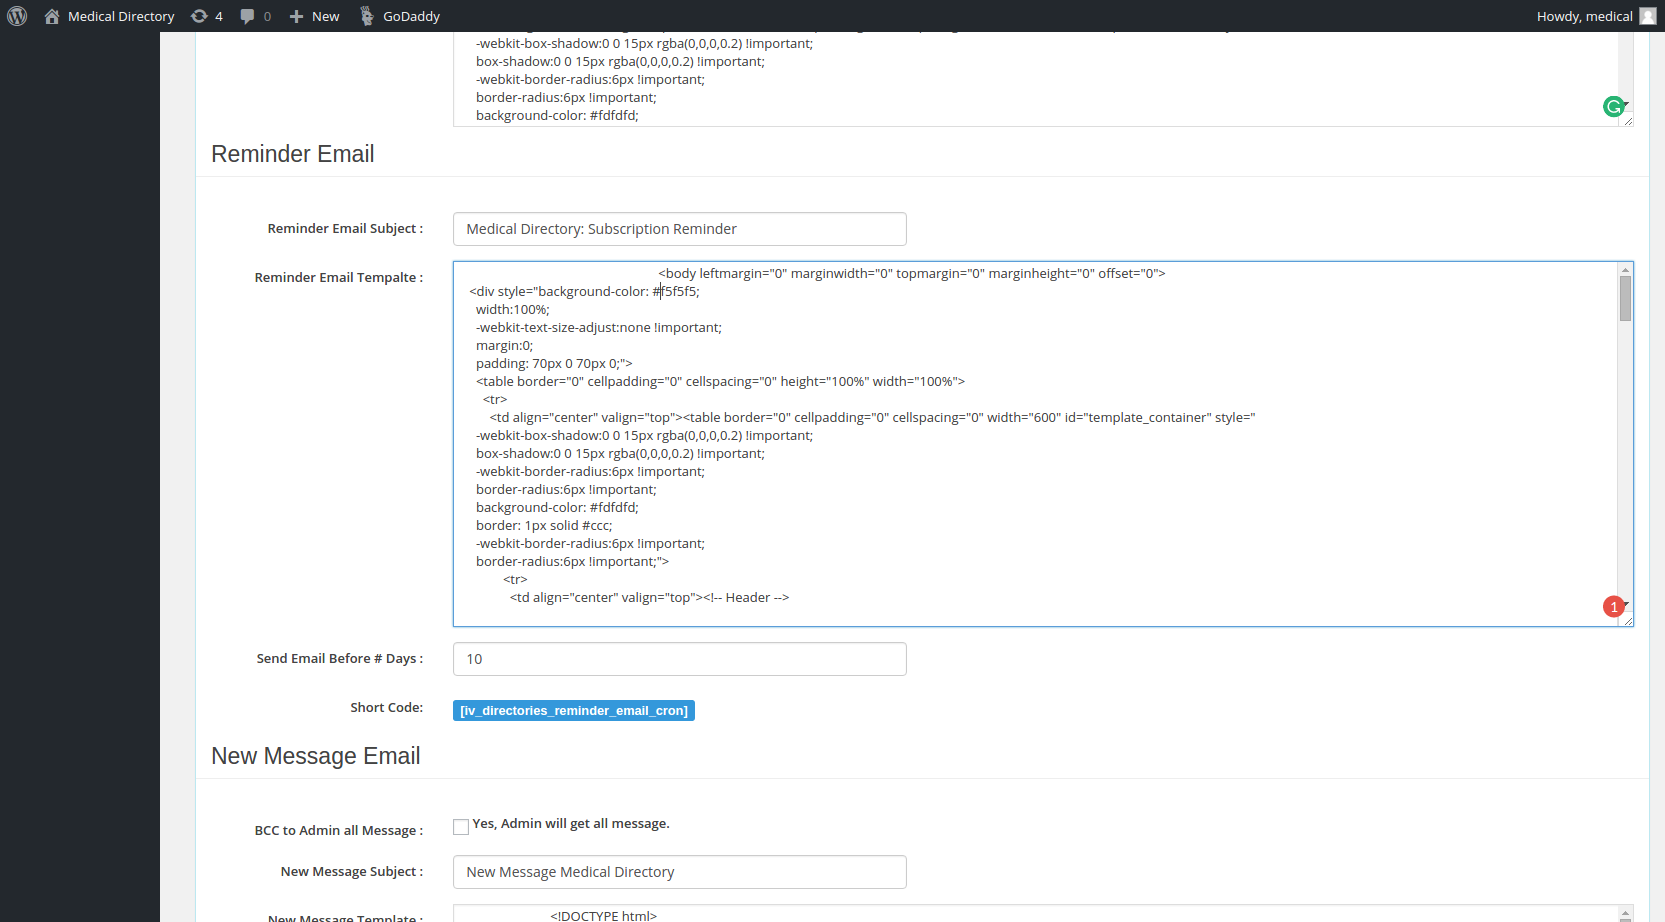
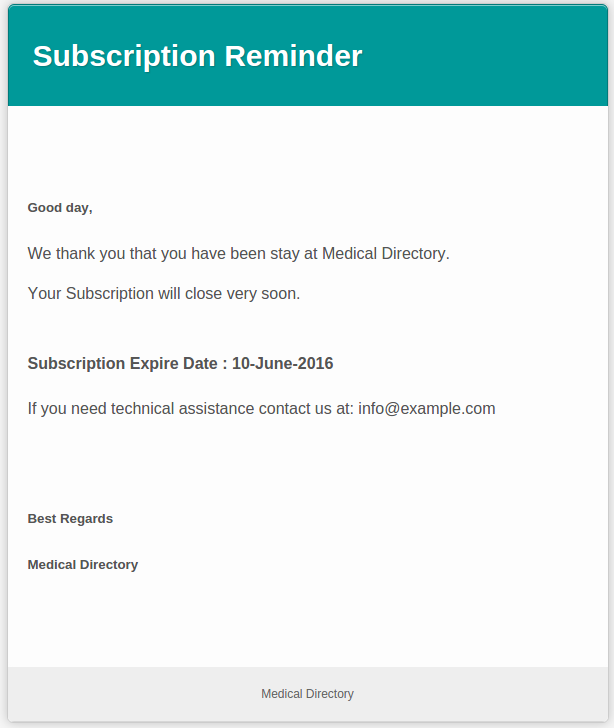
Reminder Email Setting & Template
Theme Updates
There are 2 methods to update WordPress themes to the newer version. These new updates are essential if you want to have a bug free website as we give new features and improvements to the theme over time. Some of these updates might be needed in order to make the theme compatible with WordPress newer versions. There is no risk of losing your settings and pages (If you don't edited theme core files). However if you had done modifications in parent theme files, then they will be lost.
Please note that before updating a theme, we recommend you to make a backup of your modified files. Also, we recommend to deactivate its current version and then upload the zip file with new theme version then activate and update the theme.
Update Through WordPress Admin Panel
- Navigate to Appearance > Themes Activate another theme to deactivate the Fitnase theme
- Delete the installed Fitnase theme.
- Unzip the file you just downloaded from ThemeForest and locate the WordPress Theme fitnase.zip
- Still within the Themes section, on the header tab, click on “Install Themes” , then on the header second tab click “Upload” .
- Click “Browse…”and locate the new theme file fitnase.zip
- The “Upgrade existing theme?” option choose “Yes” from the dropdown list.
- Click “Install Now”.
- Click “Activate”.
Using FTP
- Login in to your Themeforest account and go to downloads (Dashboard > downloads)
- Download the theme into your computer
- Install an FTP program (Filezilla is free)
- Retrieve your FTP login information from your hosting admin panel and login into your hosting via FTP
- Unzip the item main file
- Locate the fitnase.zip file and unzip it. Make sure your unzipping software does not create an extra directory with the same name nested into each other.
- Drag and drop theme main folder into your FTP program with the destination: “YOUR_HOSTING_ROOT/YOUR_SUBDIRECTORY/wp-content/themes/”
- FTP program will give a warning that there is an existing with the same directory name, choose replace all.And wait until all files are replaced
Support / Contact With Us
Please follow the steps below :